9 Step Baby Rag Quilt Tutorial

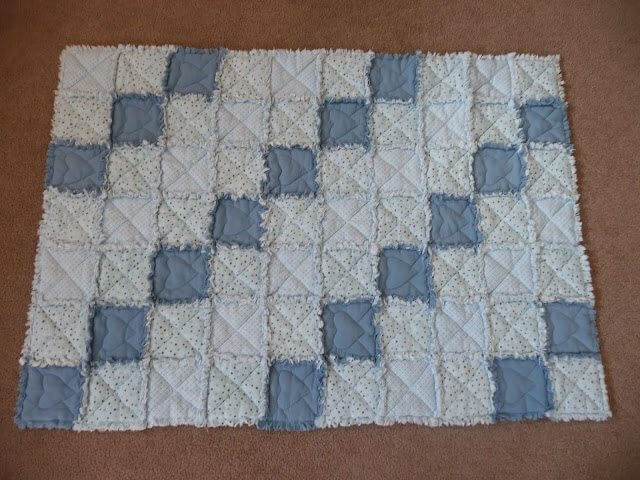
Here is another thing Grandma Lisa made for Cooper. It is so adorable! She also made my sister and I bedspreads like this when we went away to college.
9 Step Baby Rag Quilt Tutorial
Materials Needed:
- Fabric that is likely to fray (flannel, cotton, denim)
- Batting or flannel for inside the “quilt sandwich”
- Spring-action snipping shears (optional but they do help prevent hand fatigue)
9 Step Baby Rag Quilt Tutorial
Directions:
1. First decide how big you want your quilt to be, to determine how much fabric you’ll need. For this particular baby quilt, I did 6-inch squares which after being rag quilted (with a 3/4” seam allowance) turned into 4 ½ ” squares. This makes approximately a 28” X 40“ quilt. This quilt was made with 7 squares by 10 squares.
2. After you determine the size of blanket you want and how many squares it’ll be: you’ll need that many squares of flannel/batting, and twice that many squares of fabric. So for this blanket of 7 X 10 squares, you will need 7×10 = 70, so you will need 70 squares of flannel, and twice that many to do both sides.
1 yard of fabric made 42 – 6” squares so you need to decide how many colors you want for your quilt and decide how much fabric you will need for each color. I used 3 different fabrics for mine.
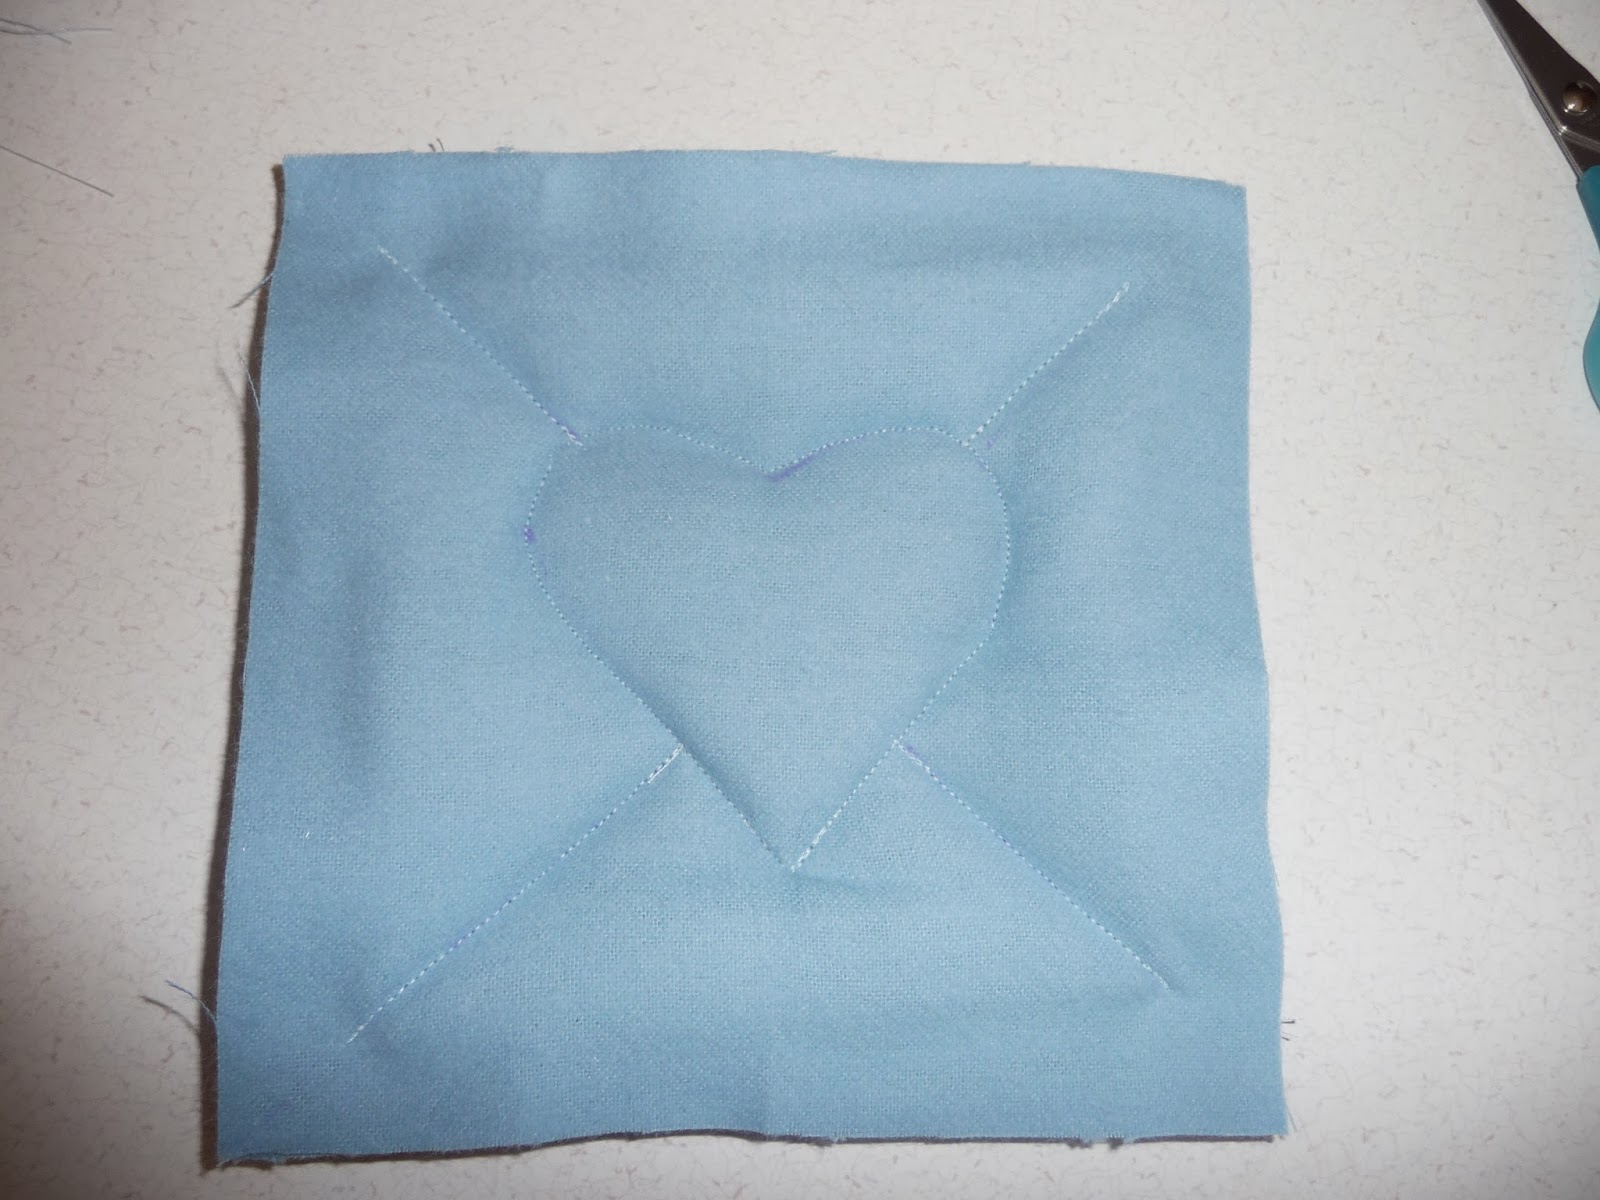
3. Now cut out your fabric squares to 6” x 6”. You’ll need two layers of fabric squares (for top and bottom layers). And one layer of batting or flannel for inside the “quilt sandwich”. If you choose to use batting, cut it to 4 ¼ X 4 ¼ so when you sew it, the batting doesn’t show. (I used batting because I wanted my hearts to puff out. Flannel would keep it simpler as they would all be the same size.)

4. To make your quilt sandwiches: lay fabric right side down then center batting/flannel on top of it. Last, lay a matching fabric on top. (Or you can use a different color on top and bottom and that will add another color into the fray.)
If you are using batting, then sew an “X” across the sandwich to quilt them together, or it will ball up. If you’re using flannel, you don’t need to quilt it together, just put the three layers together for now.
Repeat to make all quilt sandwiches. (For the heart square, I marked the heart first.)

9 Step Baby Rag Quilt Tutorial
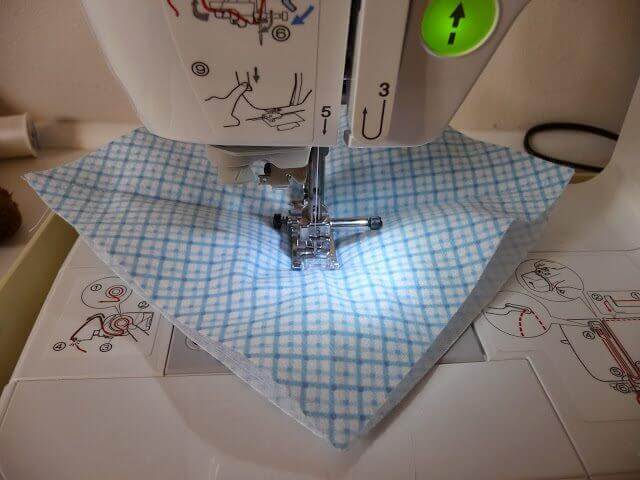
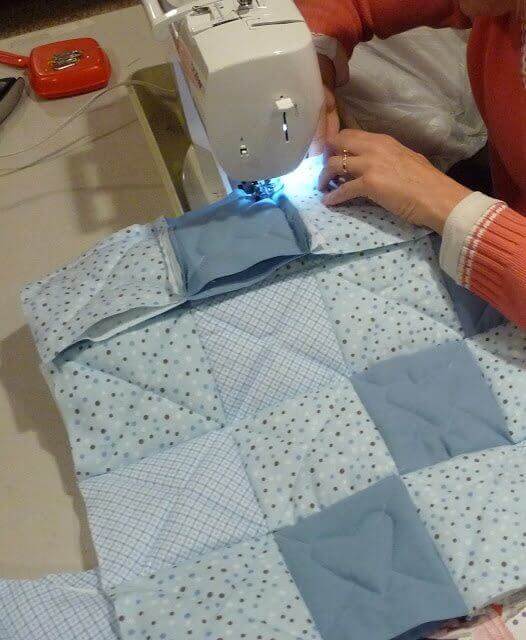
5. Now lay your quilt sandwiches out in the arrangement you want. You’ll be working with one row at a time. To sew a row of sandwiches together, join one sandwich to another with all raw edges turned “up” towards the top layer of fabric, using a 1” seam allowance. It’ll look something like this on the back:

6. After you have all your sandwiches assembled into rows, try to line up the seams as best as you can from one row to the next. Then sew the rows together the same way you did the sandwiches, with raw edges turned up. Set your stitch length to a small number, to make it stronger.

9 Step Baby Rag Quilt Tutorial

7. After you’ve joined all rows, sew a 3/4 ” line all the way around the edge of the quilt. Now cut equal snips in the seam allowances, getting close to the seams, but not snipping through them.

8. After you’ve snipped towards all the seams, toss the blanket into the wash. Dry the blanket on high heat to help it fray more and become soft and fluffy. Some people like to do this at a Laundromat because it does produce a LOT of lint. If you do this at home, just pause the drying cycle and empty the lint trap a time or two in the middle of the cycle.
9. When you remove the blanket from the dryer, take it outside and give it a good shake to get rid of spare loose threads. You may also use a tape roller. This is a good time to double-check that all of your seams are still in place,(that there are no “holes”). If you accidentally snipped into a seam line, it will have come open in the wash. If that’s the case, simply re-sew that seam in place and you’re good to go.
The more you wash and dry this blanket, the fluffier and more frayed the seams become.
The backside of the quilt will be smooth like this:

You can vary the size of the blocks, the seam allowance (which varies the amount of fray), size of the quilt, and the layout of the blocks to give you all sorts of different looks. Now that you have the basic
concept down, here are some variations of rag quilts to give you some inspiration!

9 Step Baby Rag Quilt Tutorial

9 Step Baby Rag Quilt Tutorial
check out these ideas!
batman onesie tutorial

10 Step Car Seat Blanket Tutorial

Paper Airplane Mobile Tutorial

 Your Closest CHEERLEADERS!
 We are your big sisters , cheerleaders , and confidence boosters in building a happy home. We are the Lou Lou Girls!


Last weekend a friend showed me her rag quilt she was making and I loved it. Your tutorial is just what I was looking for! Thanks!! Following you all now!
This is so great, I love it!!! Thank you for sharing at the Thursday Favorite Things Blog Hop . Big Hugs
I love these little quilts, and this one is gorgeous. Thanks tons for linking to Inspire Me. Hugs, Marty
Such a pretty little quilt, so lovely. I love the look of rag quilts
this is my favorite baby blanket pattern!! I haven't made one in awhile. I need to! Hi! Just stopping by to let you know you have been featured at Nap-Time Creations from the Create Link Inspire party. I've got some fabulous fabric themes features this week. So glad to have you part of the group. I've spread the word {and tagged you} around my social media. Would love if you could help to spread the word as well. Thanks and see you at the party next week! Emily
Thank You!!!
Very cute 😀
neat! I am going to try this. Love the little heart square, show the love!
Great tutorial! Thanks for linking up while I hosted Anything Goes Mondays!
Beautiful! Thanks for sharing @ Monday Handmade Linkup Party.
I LOVED this quilt pattern. I featured it on the FaveCrafts blog with full credit to you! See it here: http://www.favecrafts.com/blog/fc/rag-quilt-patterns/.
Doesn’t the fraying cause it to come apart after a time of several washes? Plus what if a piece of the fabric threads get in their mouths. I would think they could choke.
Please tell me what material you use that does not Fray to the point of bunched threads, or loose ones. I love how easy it is and how down to home it looks but worried about above items happening.
Actually I made a rag quilt in 2008 in anticipation of another grandchild although my daughter was not even serious. So I saved the quilt until 2013 and gave it to her. All three of her children have used it with no thread coming off to choke either one of them. We believe it is safe. It is a great tummy time quilt as it is soft plus really good for beginning crawling as the baby can grab to the fluffy part. Enjoy making one.
I love hearing your story! Thanks!