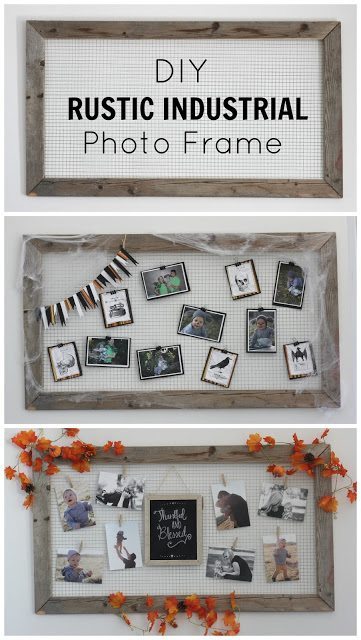
DIY Rustic Industrial Photo Frame: The Easy Home Décor Project That Makes Your Pictures Look Like a Million Bucks
If your phone is packed with hundreds of photos but your walls are still suspiciously empty… it might be time to grab some wood, a little wire, and make this ridiculously cool DIY Rustic Industrial Photo Frame.

I wanted a display where I could easily change out photos for each season so my husband put this together for me. I absolutely love it!! I may not be the best decorator, but it’s been fun to try new things every time to go with the pictures.
So far I’ve done October and November, so if you have any ideas for other times of the year do share!
Because here’s the truth.
We all take photos.
Thousands of them.
Family photos.
Holiday photos.
Cute kid photos.
Vacation photos.
Random “why is the dog doing that?” photos.
But most of those memories end up living their entire lives trapped inside our phones.
Which is honestly kind of tragic.
Photos deserve better.
They deserve walls.
They deserve frames.
They deserve a little spotlight in your home so they can remind you daily of the people, moments, and memories that matter most.
And while you could buy a frame at the store…
Where’s the fun in that?
Around here at Lou Lou Girls we believe the best home décor pieces are the ones that come with a story.
The ones you make.
The ones you customize.
The ones that make people walk into your house and say:
“Wait… you MADE that?!”
Which is exactly what happens with this DIY Rustic Industrial Photo Frame.
It’s simple.
It’s affordable.
It’s customizable.
And it has that perfect blend of rustic farmhouse charm and industrial style that makes Pinterest lovers everywhere swoon.
Even better?
This frame makes it incredibly easy to swap photos out whenever you want.
Seasonal photos?
Done.
Holiday prints?
Easy.
Family pictures?
Switch them anytime.
Which was actually the original goal behind this project — creating a photo display where pictures could easily be changed throughout the year.
And once you make one, you might discover something dangerous.
You’ll want to make more.
One for the entryway.
One for the living room.
One for the kitchen.
One for literally every blank wall in your house.
(We support this decision completely.)
So today we’re diving into this easy, stylish, totally beginner-friendly project:
The DIY Rustic Industrial Photo Frame.
We’ll cover:
• what makes industrial décor so popular
• the supplies you need
• step-by-step instructions
• creative ways to decorate your frame
• seasonal display ideas
• and a few fun Lou Lou Girls reader questions along the way
Ready?
Let’s build something beautiful.
Why Rustic Industrial Decor Is Still So Popular
If you’ve spent any time on Pinterest, Instagram, or home décor blogs over the last few years, you’ve probably noticed a decorating style that keeps popping up everywhere.
Rustic industrial.
It’s that magical combination of:
• natural wood
• metal accents
• raw textures
• vintage charm
And people absolutely love it.
Why?
Because it feels warm and lived-in while still looking modern.
The rustic elements add character.
The industrial elements add structure and simplicity.
The result?
A home that feels cozy but still stylish.
Which is why DIY projects using wood, metal, and reclaimed materials have become incredibly popular in home décor.
And this DIY photo frame captures that look perfectly.
Why DIY Frames Are Better Than Store-Bought Ones
Sure, you can walk into a store and buy a frame.
But here’s the thing.
Store frames are usually:
• expensive
• generic
• limited in size
• not customizable
DIY frames solve all of those problems.
When you make your own frame, you can:
✔ choose the size
✔ choose the wood
✔ choose the finish
✔ choose the style
Plus, DIY frames often cost a fraction of store-bought ones.
And they add something that store frames never can.
Personality.
The Secret Ingredient: Reclaimed Wood
One of the coolest parts of this project?
You can use reclaimed wood.
Old deck boards.
Scrap lumber.
Leftover wood from another project.
In the original Lou Lou Girls project, reclaimed wood from an old deck was used to give the frame a natural, textured rustic look.
Which is basically décor gold.
Old wood adds:
• texture
• history
• character
And every piece looks slightly different.
That’s the beauty of rustic design.
Imperfection is part of the charm.
Lou Lou Girls reader question:
Would you rather decorate with brand-new wood or reclaimed wood with character?
We’re firmly on Team Character.
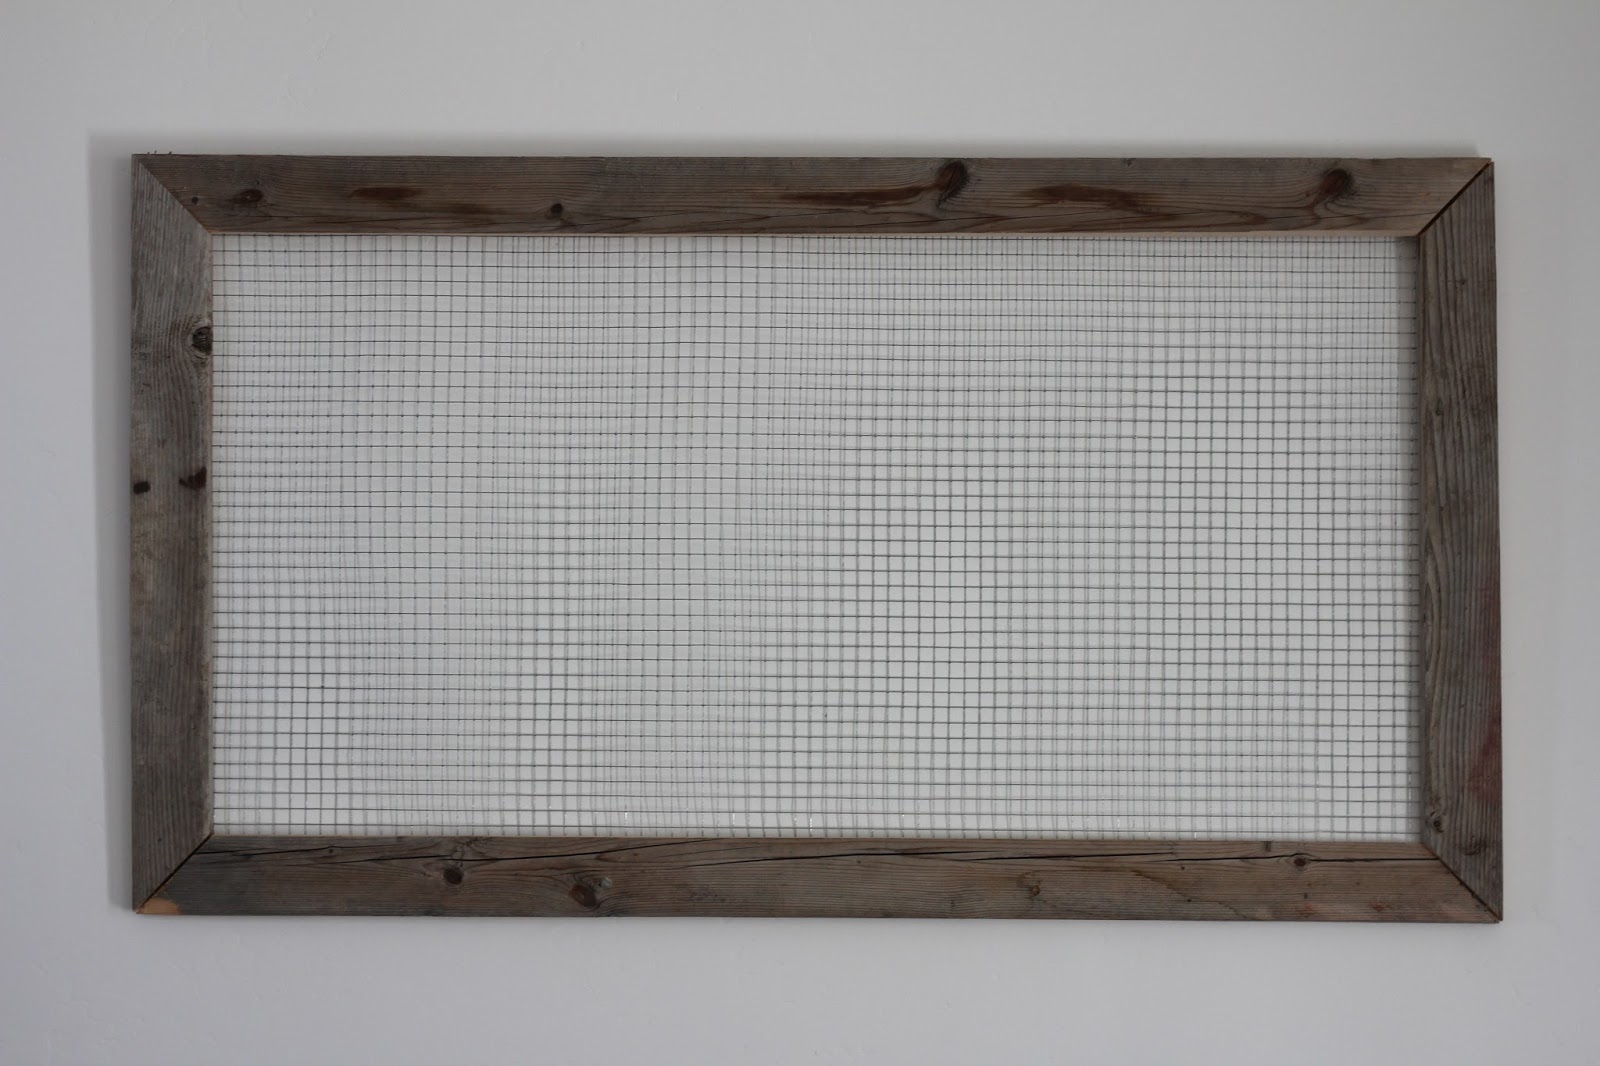
1. Decide the size of frame you want.
2. cut your pieces or wood. (We used wood from my in-laws old deck to give it a really rustic, textured look.)
3. Glue, finish nail gun, and staple your frame together. (um… yeah… we were experimenting so I think we did all three.)
4. Cut your wire to size and staple to your frame.
5. Hang on your wall and decorate!!


This was lil babe’s Halloween costume last year! My husband and I were trees. We were definitely not as cute…


This banner is made out of paper and twine.
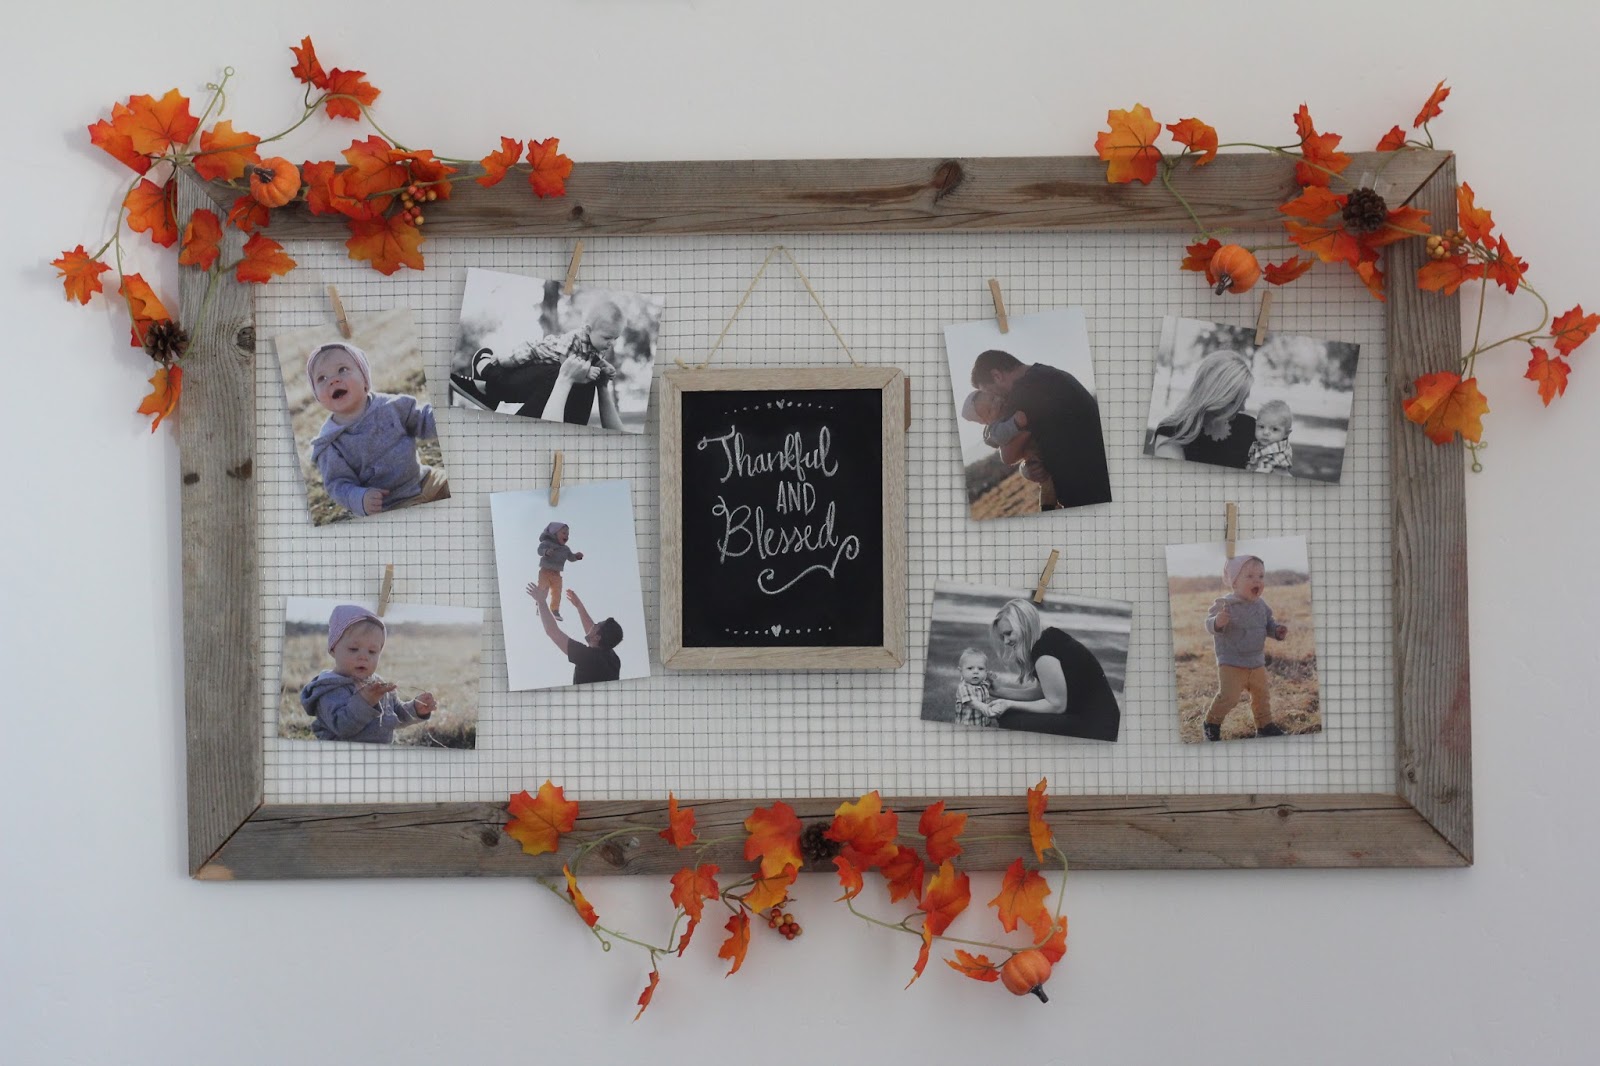


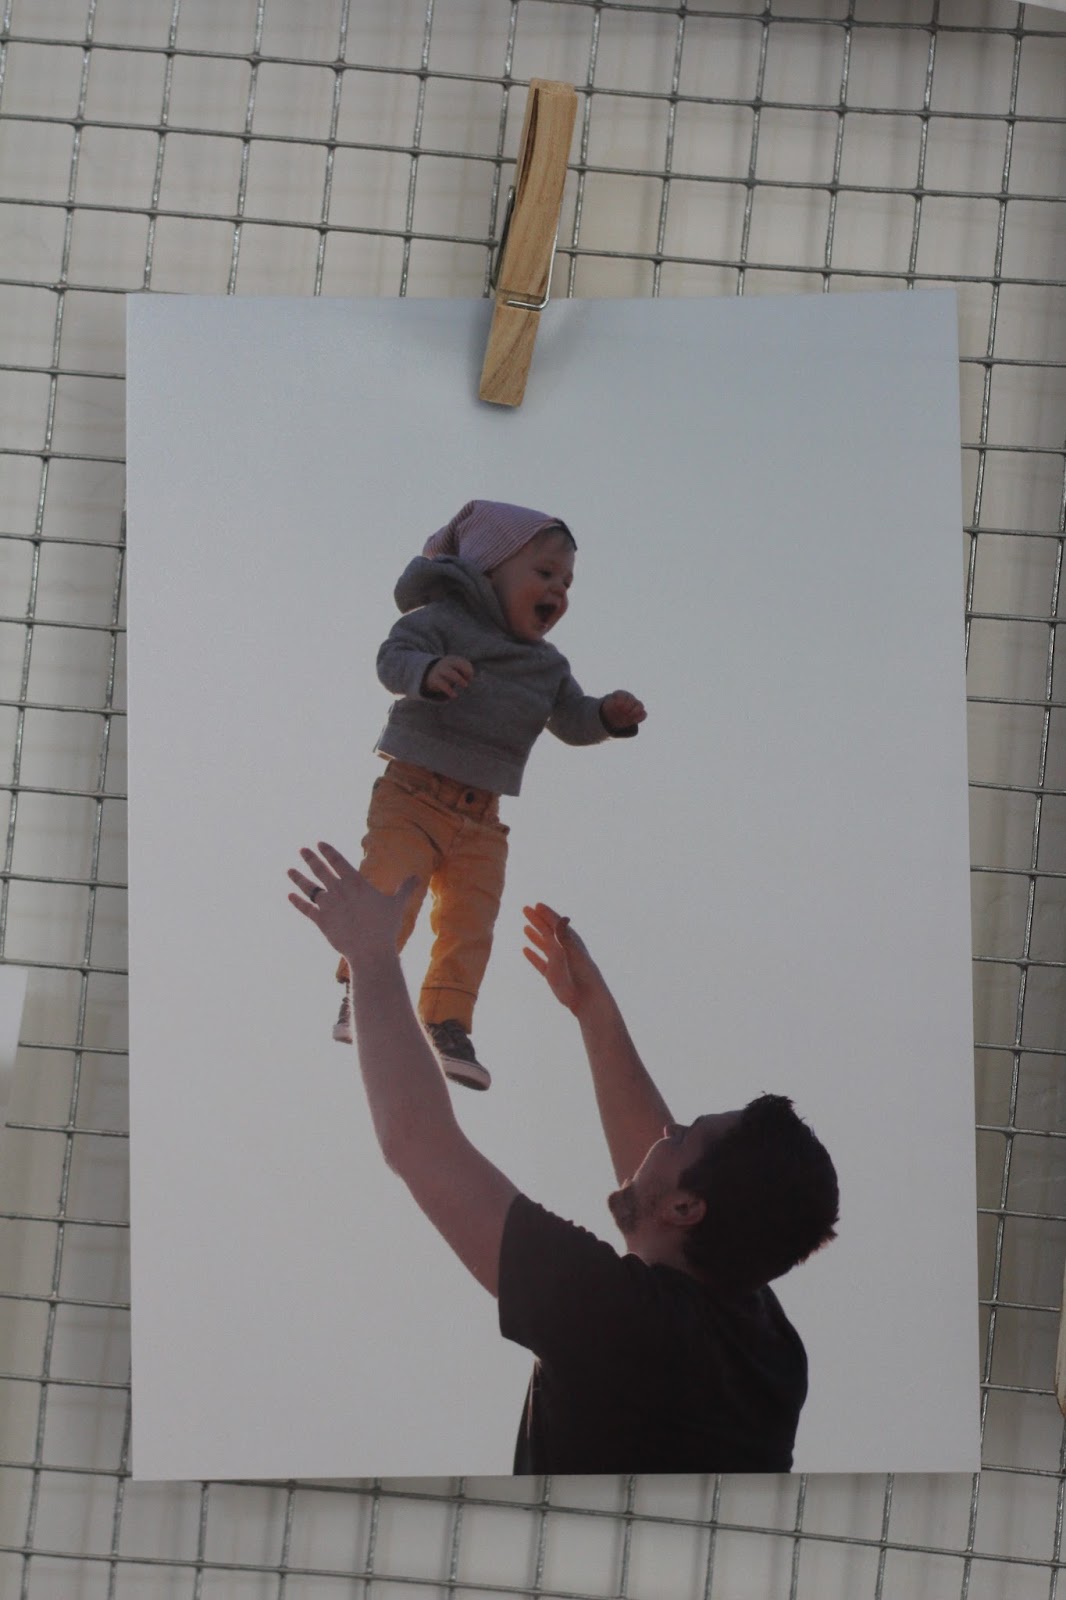
Mother’s and Father’s day photoshoots by the fabulous Beverly Photography and Design! (Ps. She’s just starting out so if you’re looking for an awesome Utah photographer, with an even more awesome price, check her out! She’s really great to work with and she travels between Logan and Utah county.)

This garland is from the dollar store!!
 Your Closest CHEERLEADERS!
 We are your big sisters , cheerleaders , and confidence boosters in building a happy home. We are the Lou Lou Girls!


Very cute frame!! Love all things rustic Thanks for linking up to Merry Monday! Sharing on Twitter! Have a great week!
Kim
I love how you did your frame and how you can change it out for the seasons.
Thank you so much for sharing with us at the Merry Monday party! We love partying with you! Hope you will join us for the new party starting tonight at 9 pm est.