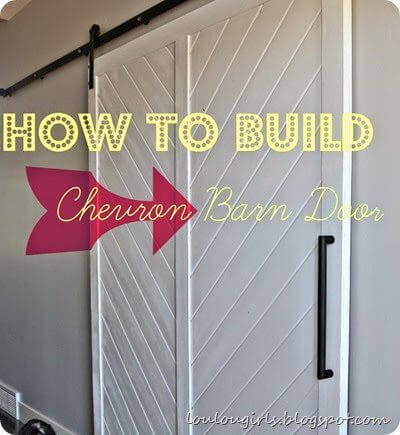
How To Build Your Own Chevron Barn Door!
When we first started planning our new house I just knew I had to have a sliding barn door. I just think they’re so cute and I love the character they can add to a space. So, right from the first drawing, I planned two spaces in our home that would accommodate my precious doors.
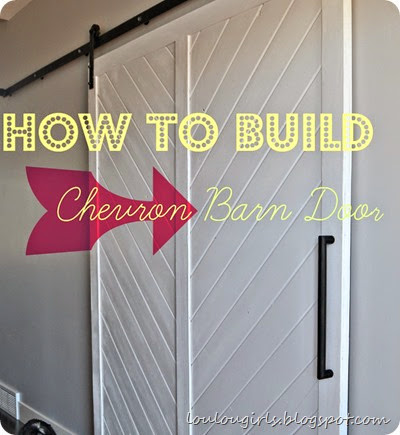
Today I’m going to show you how to build your own chevron door for less than $200!! That’s a bargain my friends! That includes stain, but not the hardware. We; however used paint, if you choose to paint, rather than stain, it will be about $50 more.
How To Build Your Own Chevron Barn Door
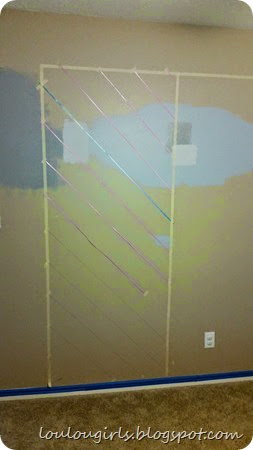
Step 1: Map out how large you would like your door to be. (We were in the process of painting our town home so we could rent it, that made this poor wall the guinea pig for all of our new house experiments.) We used masking tap and ribbon (super scientific, I know) to measure how big our door would be and decide how many slats of wood we would need.
We knew that our door opening was going to be 4’ 10” wide and 68” tall. So we decided that our door should be 5’ x 7’. We also knew that the tongue and groove slats that we were going to use would be 6” wide, so we were able to measure each one with a ruler to decide how many we would need. We ended up buying 5, 12’ slats, and 1, 8’ slat to have enough for our door. It was very precise, and didn’t allow for error, so I would suggest buying one extra slat, just in case.
How To Build Your Own Chevron Barn Door
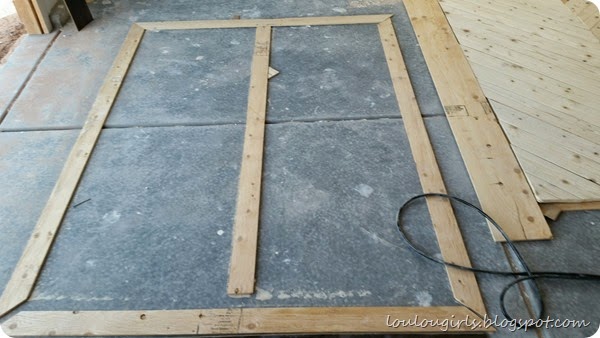
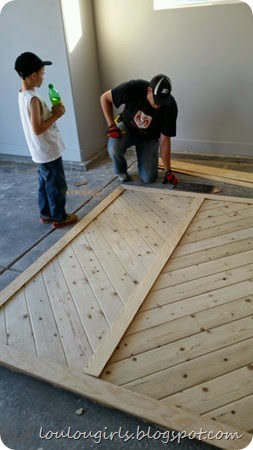
Step 2: Build your frame. We bought a 4’ x 8’ panel and had the Home Depot worker cut it into 3” x 8’ sections. We used a miter saw to cut 8 pieces at a 45 degree angle. The remaining two pieces were used in the middle section and didn’t need to be angled.
Those pieces were cut to be 6’6” and the serve as the center piece of the door. We used a square to line up the edges of the frame using the 3” x 8’ sections, then we used staple gun to secure the pieces. You should have two frames at this point. One for each side of the door, they will sandwich the diagonal pieces together.
Step 3: Sand the slats down to make sure they’re not rough. The boards we bought were only finished on one side, so we had to use a belt sander to finish the other side.
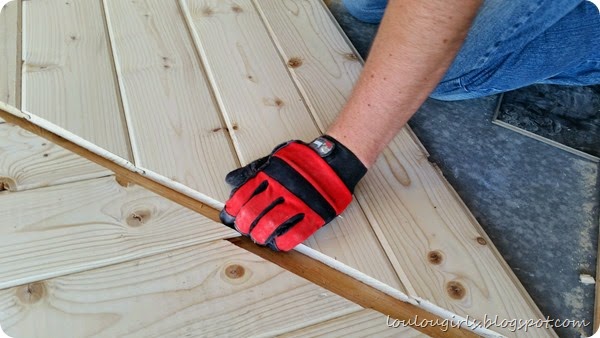
Step 4: Make your cuts. Using the tongue and groove slats that you just sanded, line up the boards on your frame and use a pencil to mark where your cuts need to be. Then make sure you cut on them on a 45 degree angle, being sure that the tongue and groove will line up when you are done. This doesn’t have to be precise because the center board will hide any imperfections.
How To Build Your Own Chevron Barn Door
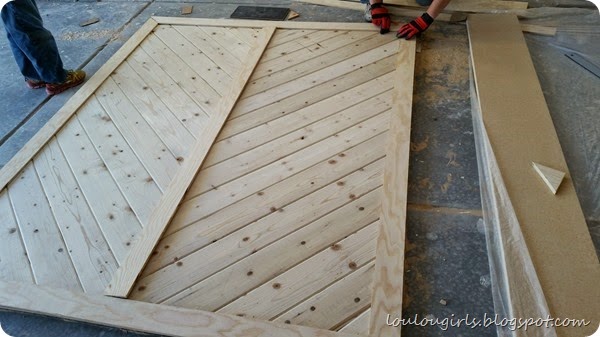
Step 5: Line the boards up so that the diagonals will meet in the center of your frame. Use a nail gun to secure them.
Step 6: Put your remaining frame on the top of your diagonals and nail them down.
Step 7: Putty any nail holes or corners that have gaps with wood putty.
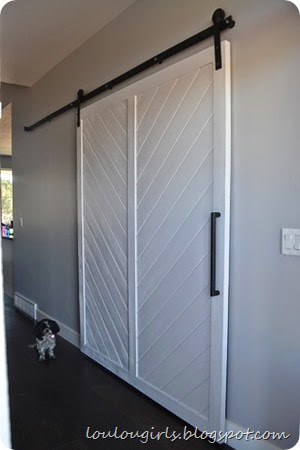
Step 8: Paint or stain your door! Initially we were going to stain it an Ebony color, then I was afraid it was too dark so we decided to paint it white. We used Kilz primer and white spray paint. Staining would definitely be cheaper and less labor intensive, so I would suggest doing that if at all possible.
Step 9: Find hardware for your door. We bought ours from Rustica Hardware. You can expect to spend around $250 for the hardware, but it is totally worth it in my opinion. Everyone comments on our door and I absolutely love the way it turned out!
It’s really an easy process if you have the patience and tools to execute it. Good luck! I hope a new barn door is in your future!
How To Build Your Own Chevron Barn Door
DIY PROJECTS
Are you looking for the perfect centerpiece for your table? Here is a DIY Farmhouse Table Centerpiece idea.
I’m so excited to show you the cute and cheap DIY Curtains I added to my girls’ room! About a month ago I showed you the whole makeover I did. You can see the whole thing by clicking on the picture or here.
DIY Massive Planter Boxes made from Pallets! Decorating the porch was a fun and easy way to make our house feel more like a home, and the great thing about this project is that it was made mostly from materials we already had on hand!



 Your Closest CHEERLEADERS!
 We are your big sisters , cheerleaders , and confidence boosters in building a happy home. We are the Lou Lou Girls!


I have no place for one, but I love yours!!
Thanks Pam!
So cute! I have wanted to put some over the open office that we have, forever. This looks do-able. Thanks for sharing.
Thanks!
I absolutely love this barn door ! It came out beautiful!
Great job!!
Kim @ This Ole Mom
Thanks!
Love this. I have always loved barn doors. I don't currently have a place to use but would love to someday. Sharing. Pinning, too, so I can keep your tutorial.
Thanks!
Hi Jessica! I just wanted to let you know that I LOVE your Chevron Barn Door, and I'm featuring you as one of my Rockstars this week from Creativity Unleashed!
As a Rockstar you're in the running for this week's MEGA Rockstar! Grab your friends and come vote at http://www.theboldabode.com/2014/08/letters-rockstars-creativity-unleahsed-week-31.html
The MEGA Rockstar gets loads of love including:
1. Shout outs on all my social media houses.
2. A bucket full of Pins to my biggest group boards
3. A big sidebar ad proclaiming them the MEGA Rockstar of the week
4. And a feature in my weekly newsletter!
Congratulations and Good Luck!!!
Thanks! I just saw this because my daughter had surgery earlier this week!
I <3 your door! Pinned
Thanks Michele!
Love your door! Great job!
Thanks!
I really, really love this. We are building a cabin in Alaska, if my husband can ever get some time off in the summer, and this would be perfect. Seriously, I really love it! Thanks for linking up to Tips and Tricks. Hope to see you this week too. Kathleen @ Fearlessly Creative Mammas
Thanks Kathleen! A cabin in Alaska sounds amazing!!
I just tore most of the closet doors off of our bedrooms (three overlapping sliding panels) and have been trying to think of what I could put in their place. I absolutely love what you made! I'll have to see if there's any possibility 🙂
I would totally recommend it! Rustica Hardware has a ton of options, including a ceiling mounted rail. You should check them out and then decide if you want to make your own or not!
Thanks Jessica Ulrich, Really helpful information. Thus selecting the right sander for that employment is very important. There are several details you have to make a decision previous to buying a belt sander the first is how big of your employment will be you are carrying out as well as the second reason is the cost of the particular sander.
Great post, i think i can do it
THanks Samuel! You can totally do it!
It’s so creative. Your guide is very helpful. Thanks very much!
Thanks!
Great post, thanks
Beautiful door! What does the other side of the door look like? Since you used the grooved slats can’t you see that on the other side?
It’s flat but you can do it anyway you want to
Where did you find the tongue and groove slats at? Love this door!