
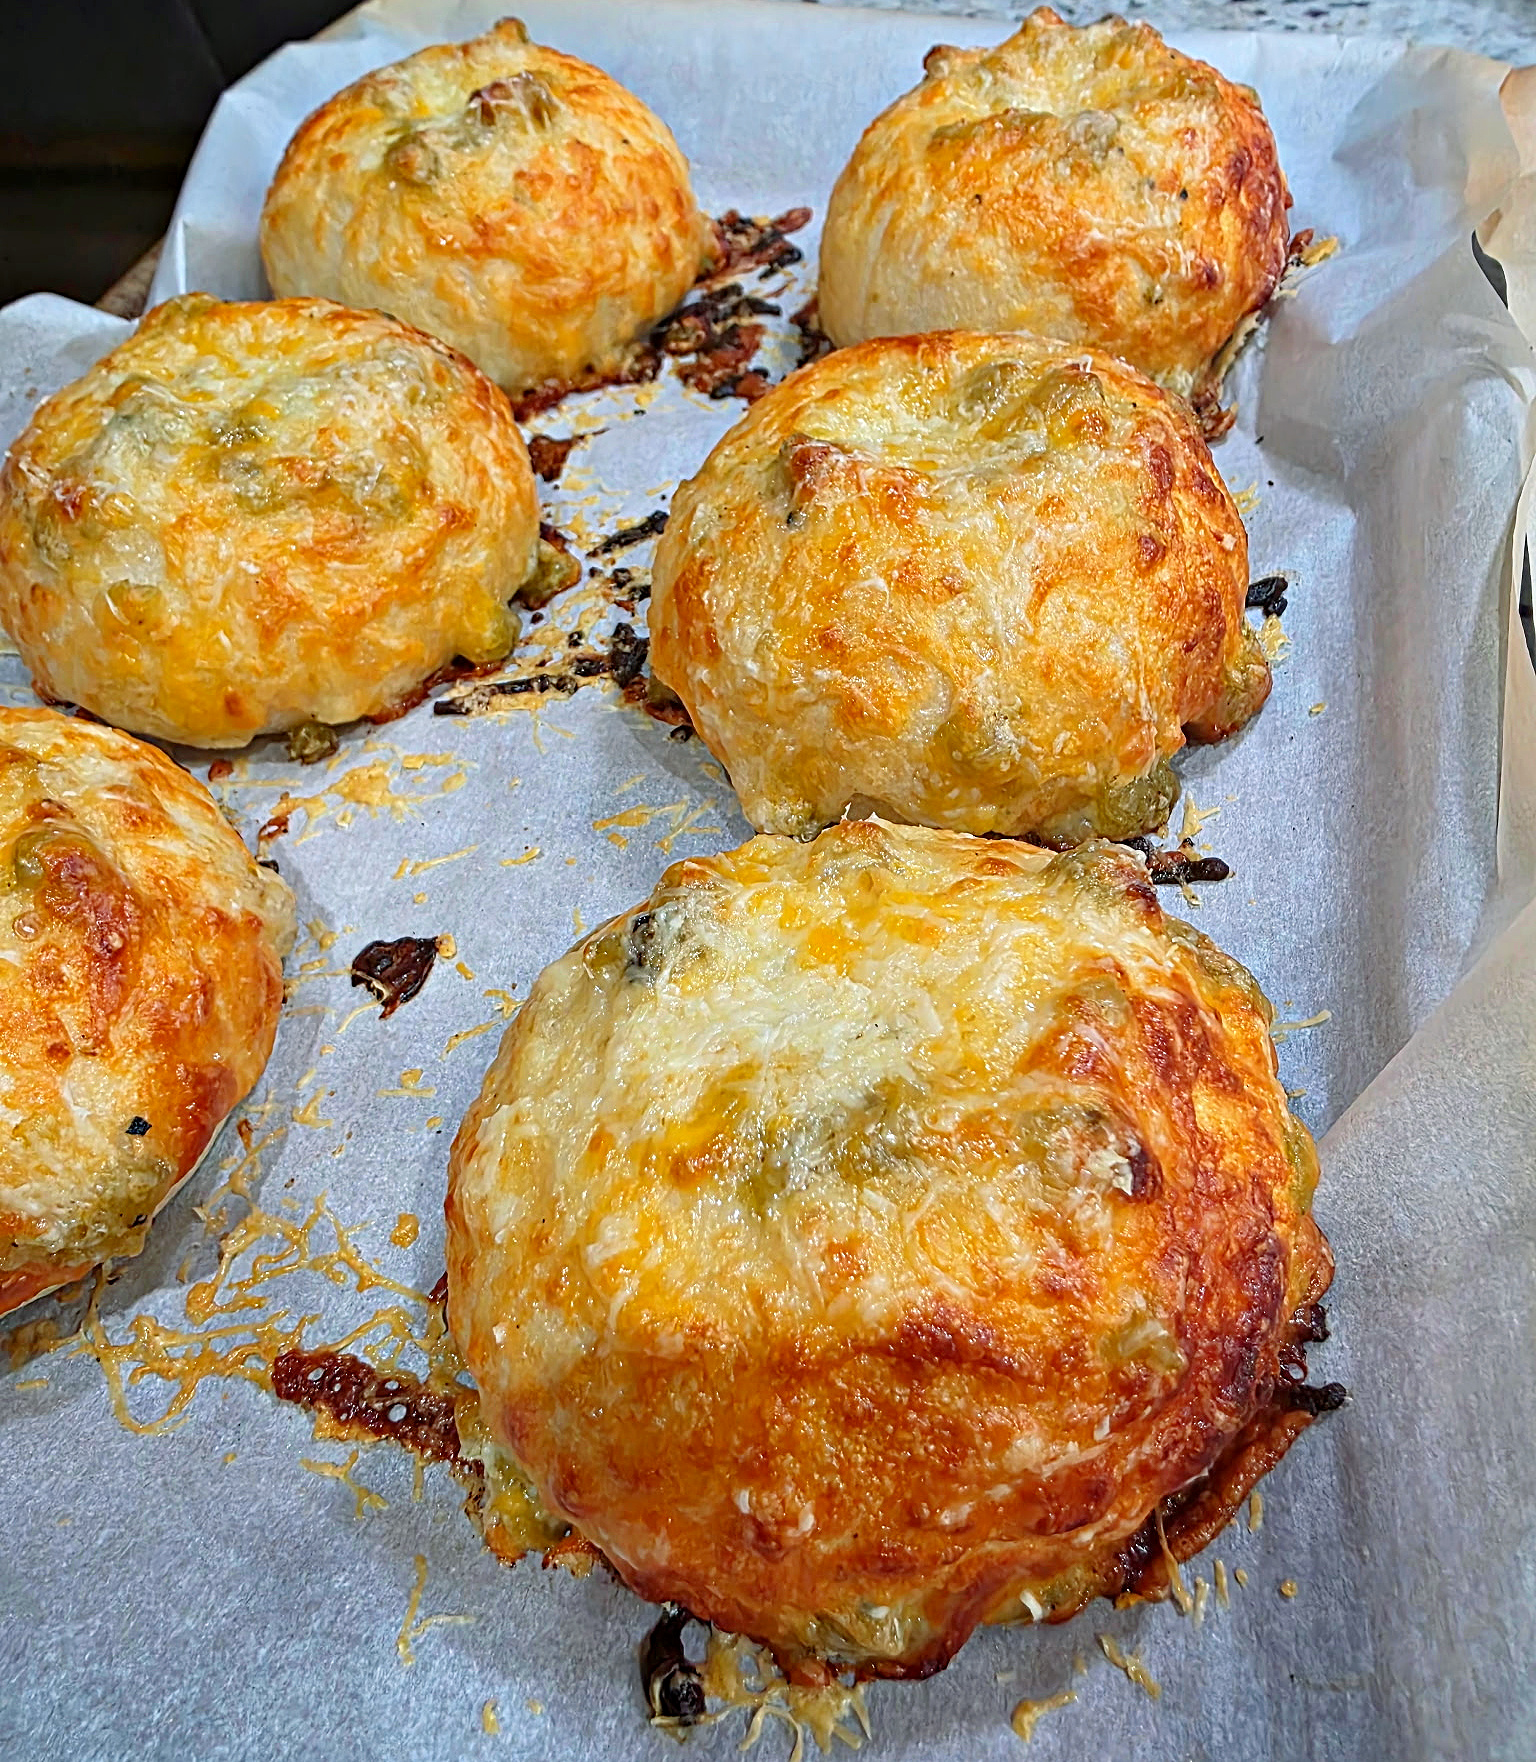
Green Chile Cheddar Bagels (Bold, Chewy, Bakery-Style Goodness)
If your bagel game needs a little personality, these Cheesy Green Chile Bagels are about to become your new favorite way to start the day.
Bagels are already one of the most satisfying baked goods out there. They’re chewy, golden, versatile, and perfect for everything from cream cheese spreads to breakfast sandwiches.
But when you add roasted green chiles and sharp cheddar cheese directly into the dough? That’s when things get interesting.
These Cheesy Green Chile Bagels bring together:
- Classic bagel chew
- Mild, smoky heat from green chiles
- Rich melted cheddar baked inside
- A crisp golden crust
- Endless serving possibilities
They’re savory instead of sweet, bold without being overpowering, and flavorful enough to stand on their own.
This recipe is perfect for:
- Weekend baking projects
- Brunch spreads
- Breakfast sandwiches
- Meal prep
- Soup pairings
- Or simply upgrading your bagel game
And the best part? Once you learn how to make bagels at home, it becomes surprisingly simple to repeat.
👉 Question for you: Are you keeping these plain… or loading them up with toppings?
🛒 Ingredients
Dough:
- 3 1/2 cups all-purpose flour
- 1 tablespoon sugar
- 2 teaspoons salt
- 2 1/4 teaspoons instant yeast
- 1 cup warm water (about 110°F)
- 1 tablespoon olive oil
Flavor Add-Ins:
- 1/2 cup roasted green chiles, thoroughly drained and chopped
- 1 cup shredded sharp cheddar cheese (divided)
Optional Finishing:
- 1 egg (for egg wash)
- Sesame seeds or everything seasoning
👩🍳 Step-By-Step Instructions
Step 1: Mix Dry Ingredients
In a large bowl, combine flour, sugar, salt, and yeast.
Step 2: Add Liquid
Pour in warm water and olive oil. Stir until dough forms.
Step 3: Add Flavor
Fold in green chiles and three-quarters of the shredded cheese. Mix until evenly distributed.
Step 4: Knead
Turn onto a floured surface and knead for 8–10 minutes until smooth and elastic.
Step 5: First Rise
Place dough in a lightly greased bowl. Cover and let rise for about 1 hour, or until doubled in size.
Step 6: Shape
Divide into 8 pieces. Roll each into a ball, then poke a hole in the center and stretch gently into a bagel shape.
Step 7: Boil
Bring a large pot of water to a gentle boil. Boil each bagel for 1 minute per side.
This step is what gives bagels their signature chew and glossy crust.
Step 8: Top & Bake
Place on a lined baking sheet. Brush with egg wash if desired. Sprinkle with remaining cheese.
Bake at 425°F for 18–22 minutes until golden brown.
Cool before slicing.
🔥 Why Boiling Matters
Boiling:
- Sets the crust
- Creates chewiness
- Helps bagels rise properly in the oven
- Gives authentic bakery texture
Skipping it turns bagels into regular bread rings. We are not doing that. 😉
🧀 Cheese Tips
- Use sharp cheddar for bold flavor
- Pepper jack for heat
- Freshly shredded cheese melts better
- Add extra cheese on top for a crispy crust
🌶️ Green Chile Notes
- Use roasted canned green chiles for convenience
- Drain thoroughly to prevent soggy dough
- Mild or medium works best for balanced flavor
- Fresh roasted chiles also work beautifully
🔄 Variations
- Add garlic powder
- Mix in diced jalapeños
- Sprinkle everything seasoning on top
- Make mini bagels
- Turn into bagel sandwich buns
- Use Monterey Jack instead of cheddar
👶 Kid-Friendly Adjustments
- Use mild chiles
- Serve toasted with butter
- Turn into breakfast sliders
- Let kids help shape dough
- Pair with scrambled eggs
🛒 Grocery Tips
- Buy flour in larger bags to save money
- Freeze extra shredded cheese
- Keep instant yeast in the fridge for longer shelf life
- Double the recipe and freeze half
To freeze:
Cool completely, slice, and store in freezer-safe bags.
🔥 Serving Ideas
These bagels are amazing:
- With cream cheese
- As breakfast sandwiches
- Toasted with avocado
- With eggs and bacon
- Alongside soup
- As lunch sandwich bases
🏆 Reader Challenge
Here’s your challenge:
Make these bagels.
Try one topping variation.
Then share your favorite way to serve them.
Did you keep them simple?
Or did you go full flavor mode?
🍽️ Leftover Ideas
- Slice and toast for breakfast
- Make bagel chips
- Use for mini sandwiches
- Turn into croutons
- Freeze for quick meals
💭 Final Thoughts
Homemade bagels may seem intimidating, but once you try this method, you’ll realize how manageable and rewarding it is.
Adding green chiles and cheese transforms a classic recipe into something bold and memorable. It keeps the traditional texture while adding depth of flavor.
These bagels are:
- Chewy
- Savory
- Slightly spicy
- Comforting
- Versatile
They work for busy mornings, brunch gatherings, and meal prep. They’re practical but exciting — the best combination.
And the aroma while they bake? Absolutely worth it.
🧡
There’s something incredibly satisfying about baking bread at home. Watching dough rise. Shaping it by hand. Boiling it. Seeing it turn golden in the oven.
It feels intentional.
It feels creative.
And it feels rewarding.
These Cheesy Green Chile Bagels bring together texture, flavor, and simplicity in one recipe. They’re proof that you don’t need complicated ingredients to create something impressive.
Whether you’re serving them fresh out of the oven or toasted the next day, they deliver consistent results every time.
They’re adaptable to different tastes, easy to customize, and perfect for anyone who loves savory baked goods.
Once you try homemade bagels with this flavor combination, plain versions might start to feel a little less exciting.
And that’s a good thing.
Because now you’ve leveled up.
So here’s the final question:
Are you eating them warm with melted butter… or building the ultimate breakfast sandwich masterpiece?
Either way — these bagels are ready for their moment. 💚🥯🧀
 Your Closest CHEERLEADERS!
 We are your big sisters , cheerleaders , and confidence boosters in building a happy home. We are the Lou Lou Girls!


