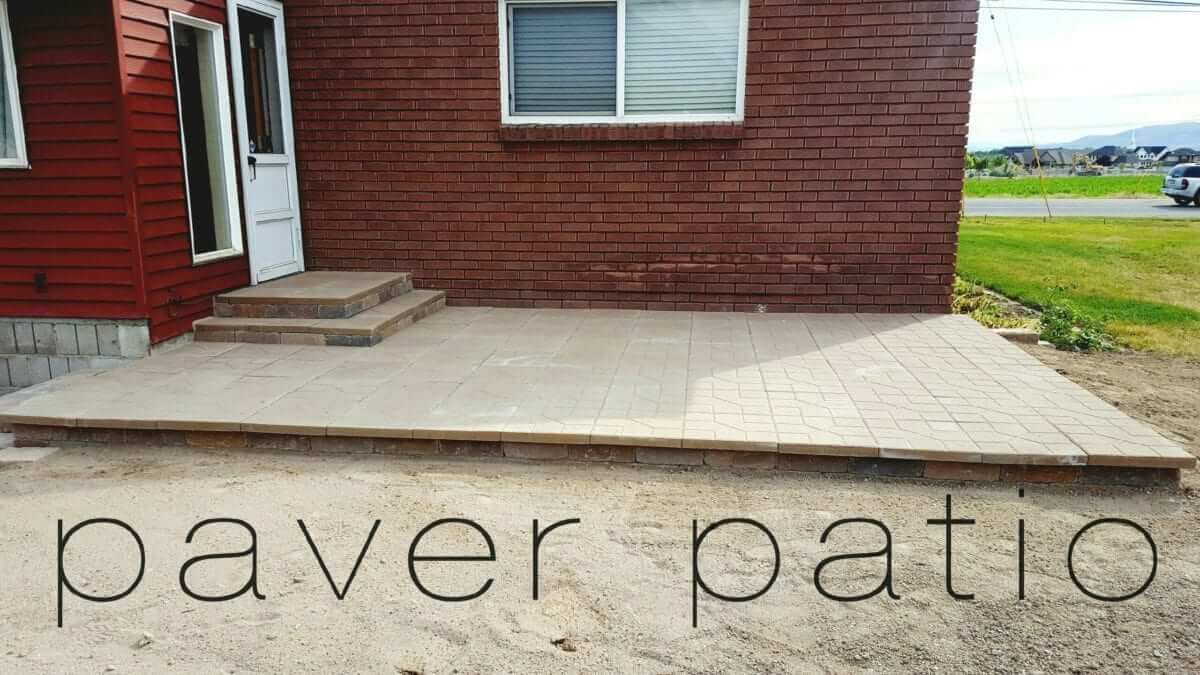
DIY Paver Patio
This summer we took on a HUGE project! It was super fun to do together! Here is what we did for our DIY Paver Patio!

DIY Paver Patio
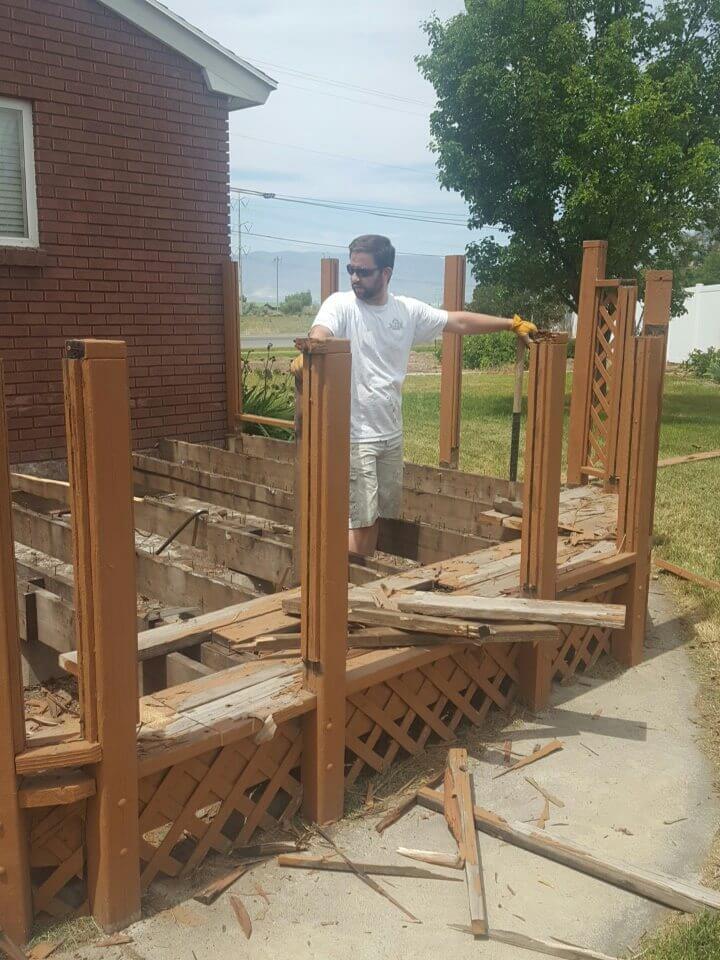
June was the month of the paver project! Matt’s grandma decided she wasn’t loving her wood deck and so Matt offered to fix it! Now it was a good thing he did that because the deck was beginning to rot. Disclaimer:
We are not professionals, this what we did base on the information we had read online and in books and youtube videos.
First, the thing we had to do was demolition of the old deck. This took a Sawzall
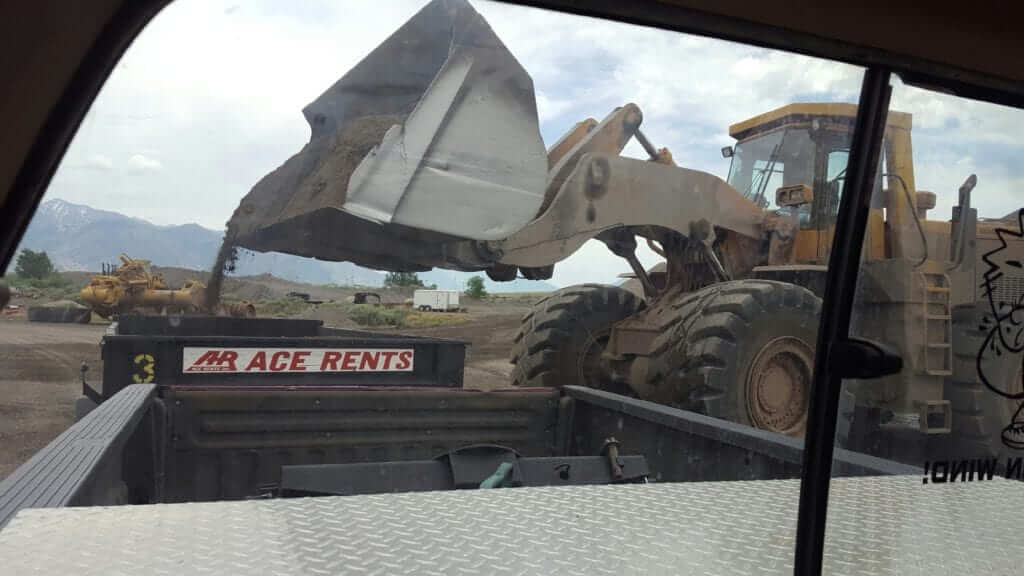
Next, we had to build up the ground and level the ground with a road base. The picture below is us getting the road base. That tractor was Ginormous! Matt got out next to it I wish I had taken a picture, he is 6 foot and he was only two-thirds of the tire!
Anyways, we made a lot of trips to Geneva for road base! That stuff is heavy, I suggest getting a tractor or bobcat to move this dirt. We were lucky enough to borrow my grandpa’s Kubota! It saved us time and soreness!
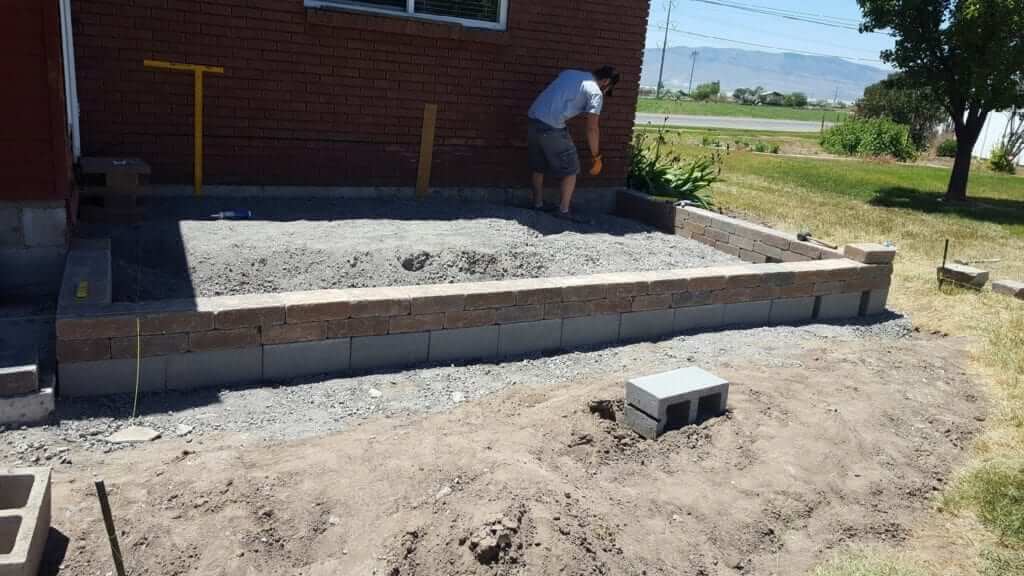
We moved in the road base into the area and leveled the road base with a laser level at 11 at night and so I have no pictures. Around the perimeter we used cinderblocks and we used a level to make sure each block was level. As you can see below we clearly didn’t buy enough road base with our first two trips. Matt did the math but we added some height to the deck.
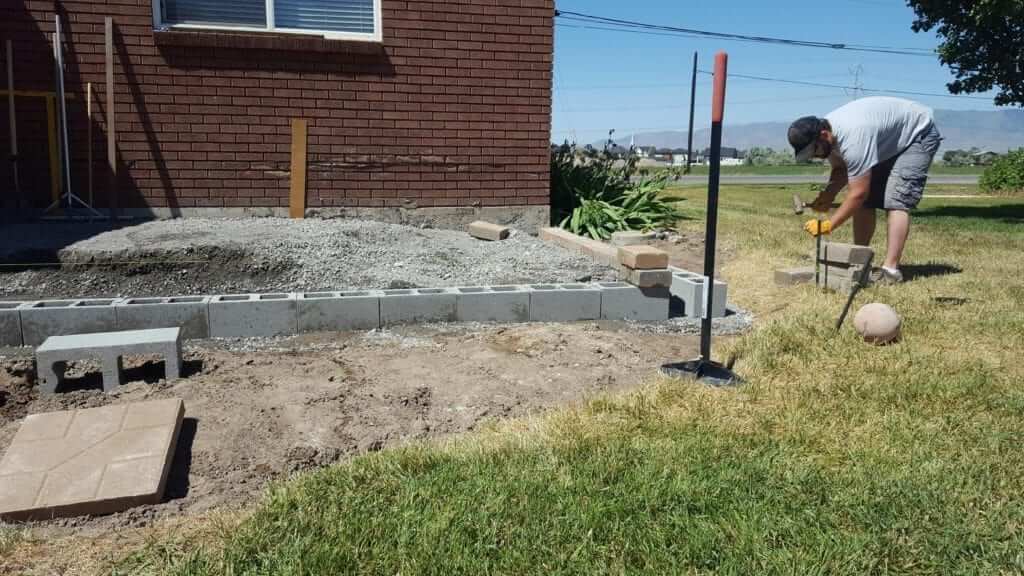
Next, we put on two layers of the pretty block, we used outdoor landscaping glue we got at Home Depot to glue the blocks to the cinderblocks. Then we went back and bought more road bases. Yay! Heaviest stuff on the planet! It’s a beast to rake, shovel, move! Then you have to level and level and level some more! Leave about an inch for sand.
Then for the sand, also, surprisingly heavy! We found landscaping sand on Geneva Road in Orem for way cheaper than you can buy it at home depot. We bought a yard at Home Depot for the same price as 2 yards were at the other place.
Do your research. Put the sand in and level it for days again! We used a tamper to help aid in this process.
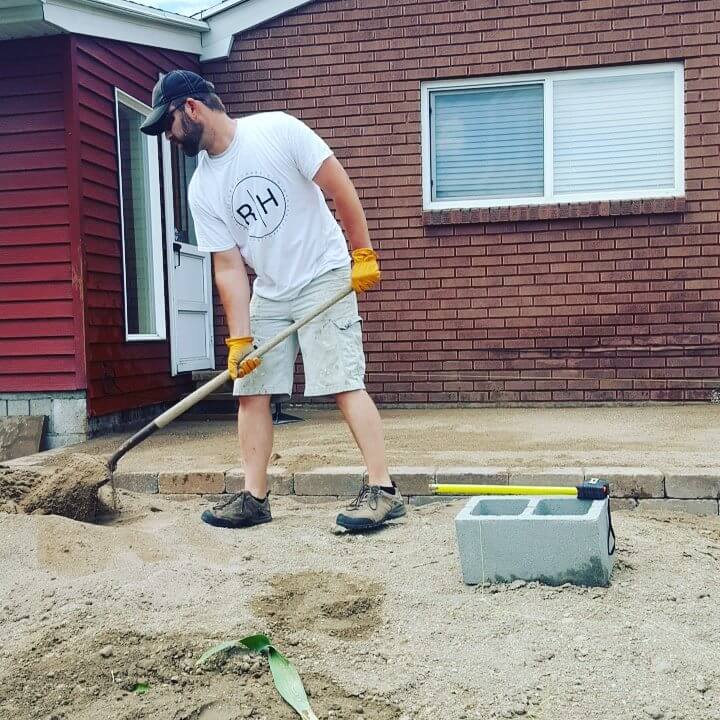
It was too bright outside for the laser level so we ended up using a yardstick, string, and string level to level the sand.
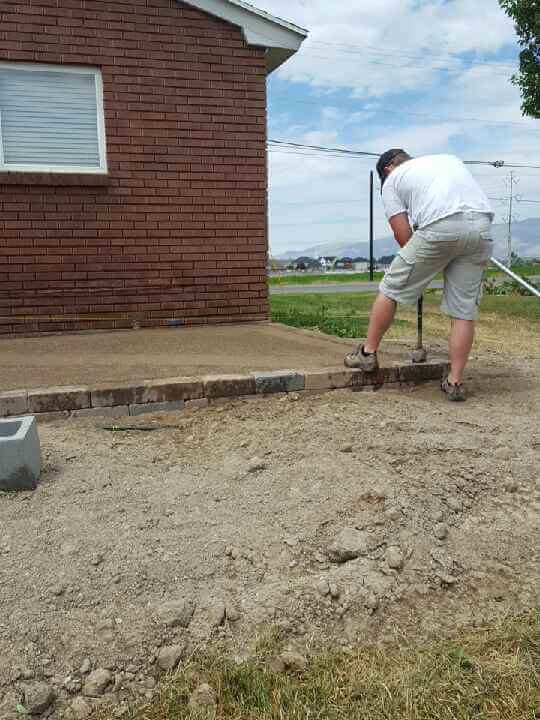
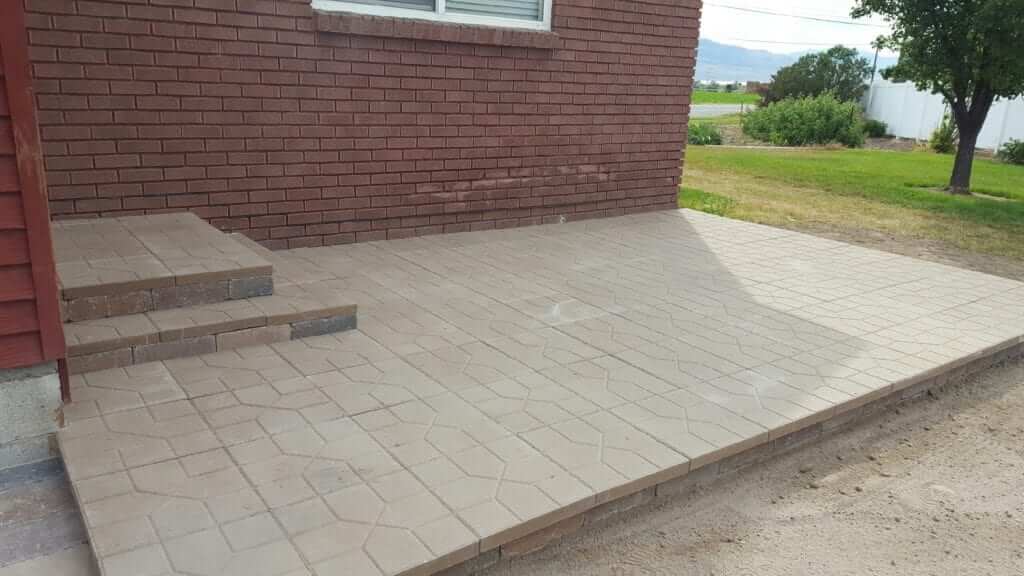
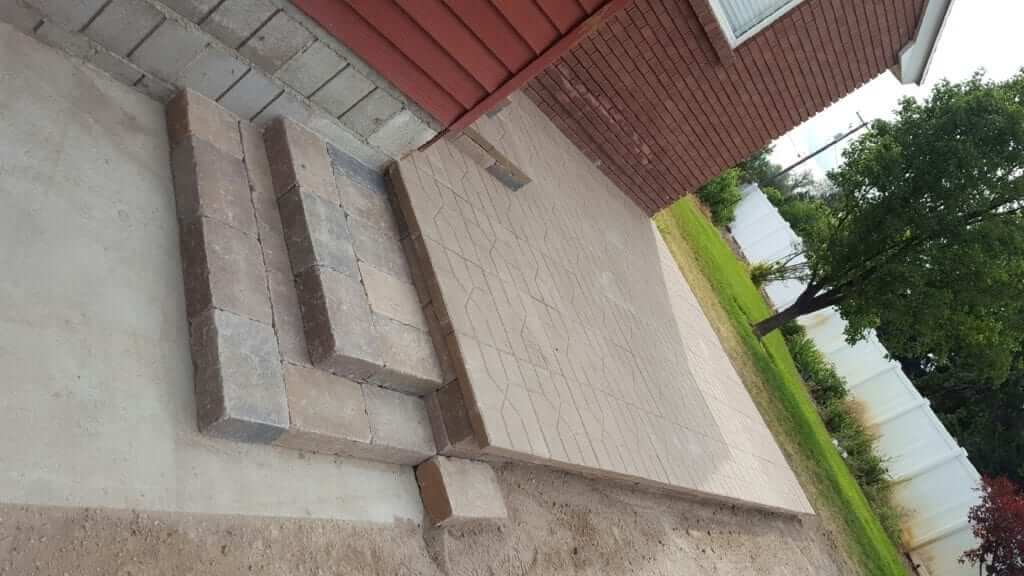
Next, we placed the paver stones individually using a level to make sure each block is level. Once all the blocks are leveled and placed we used a leaf blower to blow off any unwanted dirt. Then we swept on Quikcrete sand in between each block, then wetted it down with the hose on mister setting.
Last, you have to let it dry for 72 hours, if it’s going to rain cover it with plastic because the sand washes out easily! We had to redo the sand 3 times until it was complete.
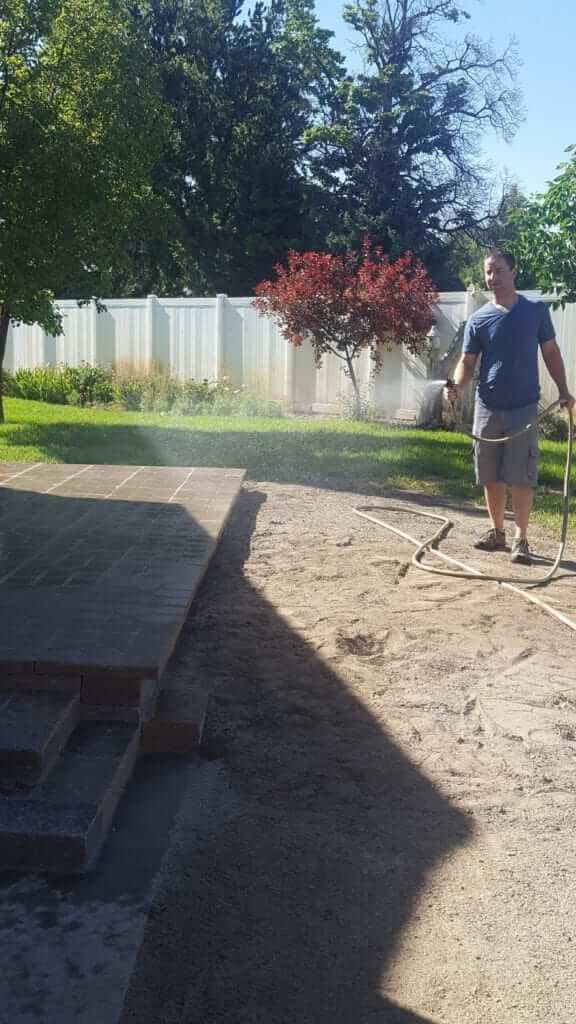
Last we put in topsoil where we tore out the concrete so that we could plant grass seed! I think they are very happy with how it turned out and we learned a lot during this process!
If you decide to take on this project make sure to do your research and your math correctly the first time.
 Your Closest CHEERLEADERS!
 We are your big sisters , cheerleaders , and confidence boosters in building a happy home. We are the Lou Lou Girls!


beautiful! i love pavers, and would have loved to do a patio, but a friend was getting rid of his bricks so we made a recycled brick patio instead. enjoy!
b
Ohhh….I like the new patio! It looks so neat and clean. I’m sure it will look amazing with potted flowers, etc. on it. Looks like y’all did a great job!
it looks fantastic! When will you be by to do mine ( wink). It’s so hot in Utah I don’y know how he can stand the heat. I go outside with our fur baby Izzy and I last for about 5 minutes. xo
These are such helpful tips and photos! I am so glad you shared this easy to follow tutorial for creating DIY Paver Patio with us at the Plant-Based Potluck Party. I’m pinning and sharing.
How did you get the top designs on the concrete they look so great. Please tell the secret.