How To Frost An Ombre Cake
")
My friend Michelle wanted to take pictures of her baby boy for his 1st birthday and she asked me to make an Ombre cake for him. She decided she liked the rough frosted look, which is awesome, because it’s easier to do!
I’m going to show you how I did it. It’s really easy and anyone can do it.
How To Frost An Ombre Cake
First, start by baking your cake.
Next, freeze your cakes. Yes, I said freeze them! It makes them much easier to frost, in my opinion. My mother-in-law has been making cakes for 30 years and taught me all her secrets and she has always frozen her cakes before frosting, plus it helps make the cake more moist.
Next, find a cardboard cake circle for the cake sit on. Put a dab of frosting on top of a Lazy Susan, and some on the cardboard so the cake won’t slide while you’re frosting.
")
Place your frozen cake on top of the cardboard round and push it down, so the frosting squeezes to the edges.
")
Cover the bottom layer with frosting, it doesn’t need to be perfect, just make sure it’s level. Push the other frozen cake on top.
")
I like to give it a rough frost to catch any crumbs and to make sure the cake is extra gooey and delicious.
")
Use an offset spatula to frost it as smooth as possible.
")
How To Frost An Ombre Cake
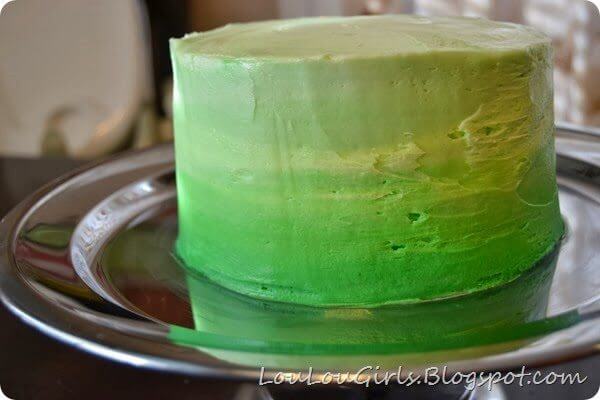
Now it’s time to mix your colors. I started by adding one drop at a time of green and separating the frosting as I went into different bowls until I had 3 shades of green in different bowls.
Then I piped the frosting onto the cake starting with the lightest shade at the top and moving to the darkest at the bottom. You could use any colors you wanted here and it would look awesome.
")
Next, I get a tall glass of hot water and my spatula and start to smooth. I start by dipping my spatula in the hot water and tapping off all the excess water, then I gently smooth the cake while turning the Lazy Susan slowly. This takes practice folks, so don’t be discouraged if it takes a while to get it done!
")
")
")
If your spatula get too wet it could make your cake too soft, so make sure you also have a clean cloth next to you to wipe off any excessive water, or frosting that builds up on your spatula.
")
")
Keep at it until it’s smooth, don’t worry or get discouraged if it’s not perfect! It’s your creation and it can be however you want!
I think it turned out great for a cake smash! Don’t you? Even though our chubby little buddy wasn’t that into it!

 Your Closest CHEERLEADERS!
 We are your big sisters , cheerleaders , and confidence boosters in building a happy home. We are the Lou Lou Girls!


This is so cool. I love ombre and this cake just looks so delicious!
Thanks!
I learned something new today! Thanks for the tutorial!
Thanks for stopping by!
I love ombre cakes, this one is beautiful. Thanks for linking up at Sweet and Savoury Sunday, stop by and link up again this weekend!
This is amazing. I think I could maybe do this! Your tutorial makes it look easy! Thanks for linking this up to Saturday Night Fever – I love your blog! Pinned this and hope you'll come back again tomorrow to link up!
You made that look too easy! What a gorgeous cake!
Thank you for stopping by the Thoughtful Spot Weekly Blog Hop this week. We hope to see you drop by our neck of the woods next week!
Great tutorial! I`ve been meaning to make an ombre cake but I`m a little bit afraid of a disaster :))
How cool. I will need to use this on my next cake. 🙂 Will let you know!!
Thanks for linking up at Teach Me Tuesday!! Another party will start tonight @ 8pm. Hope to see ya there!
Great tutorial 🙂
Thanks for sharing over at Creative Mondays..