How to Distress a Door Shabby Chic

Cassie has always wanted a Shabby Chic wedding and so we have had the opportunity to do a lot of DIY projects. This turned out so cool and now my husband wants to do all the doors in my house!
We had some old doors in our basement that weren’t being used and now they have a whole new life!

How to Distress a Door Shabby Chic
Step One: The doors that we used are like the one in the picture. They were painted white. We painted the door yellow to match the colors of the wedding, but you can paint it any color.
One coat will do and then let it dry, ( I forgot to take a picture when we were painting the yellow coat, oops!)

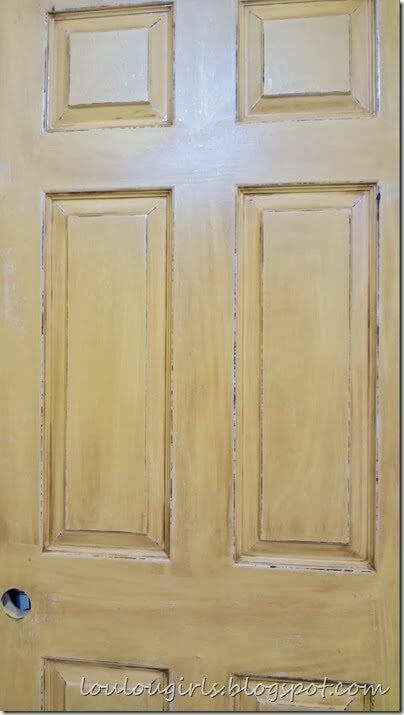
Step two: Take a razor blade and strip the paint from the edges of the door, all the way to the wood. We did all the seams of the door. On the flat part, we just scuffed up the door, some places you can see the white paint and others you can’t. Sand paper doesn’t work as well and doesn’t leave a weathered look.

How to Distress a Door Shabby Chic
It’s personal preference how much you rough up the door.

Step Three: Brush on some wood stain, (it doesn’t matter what color) we used Mahogany. A little stain will go a long ways. Make sure to soak the edges because it will give it a more weathered look. This will work as a glaze for your door. Let sit for a few minutes before proceeding to the next step.

Step Four: Take an old cloth and wipe down the door. Make sure to wipe off all the excess stain. Taa Daa, you have a really cool door!!!
 Your Closest CHEERLEADERS!
 We are your big sisters , cheerleaders , and confidence boosters in building a happy home. We are the Lou Lou Girls!


Great tutorial! I'm featuring it in this week's PoPP Spotlight. Thanks for linking up!
Thank You!
Hi, I love your tutorial! I was thinking of trying it on our front door, however it is a metal door and gets VERY hot in the summer. I was hoping that this weathered look might work better on our door and the finish would last longer. What do you think?
After we did this project, my husband wanted to do all the doors in the house. It's looks awesome but I have never tried it on a metal door. I would love to hear how it turns out.
Oh, I bet your home looks lovely with these doors! They remind me of an architectural salvage yard I go to, but way more reasonable! 🙂 Great tutorial, thanks a lot for stopping by and sharing it at Best of the Nest!
Great tutorial! I love how it turned out. Thank you for linking to the In and Out of the Kitchen Link Party. Hope to see you next time.
I just love you Lou Lou Girls! So Fabulous! Sharing…Coming by from Crafters Corner Cafe.
I am destressing my dutch door for my tiny house. I bought it off Craigslist and had it cut to my doors specs. The sander that was being used took a little more off than anticipated so now it becomes distressed.
I would love to see a picture!