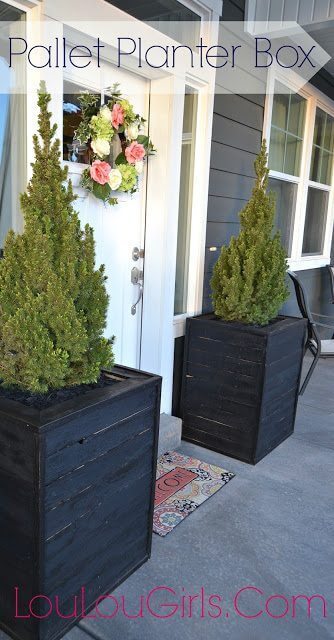
DIY Planter Boxes
DIY Planter Boxes! Decorating the porch was a fun and easy way to make our house feel more like a home, and the great thing about this project is that it was made mostly from materials we already had on hand!
Don’t worry, it’s only been a year and a half and I’m just getting around to decorating my front porch! I’m so happy to HAVE a front porch at all, but it’s nice to be able to enjoy the view from my front porch now! Our yard has been a huge undertaking and we still have a lot of dirt, but we’ve done a lot with the l
andscaping since we moved in.
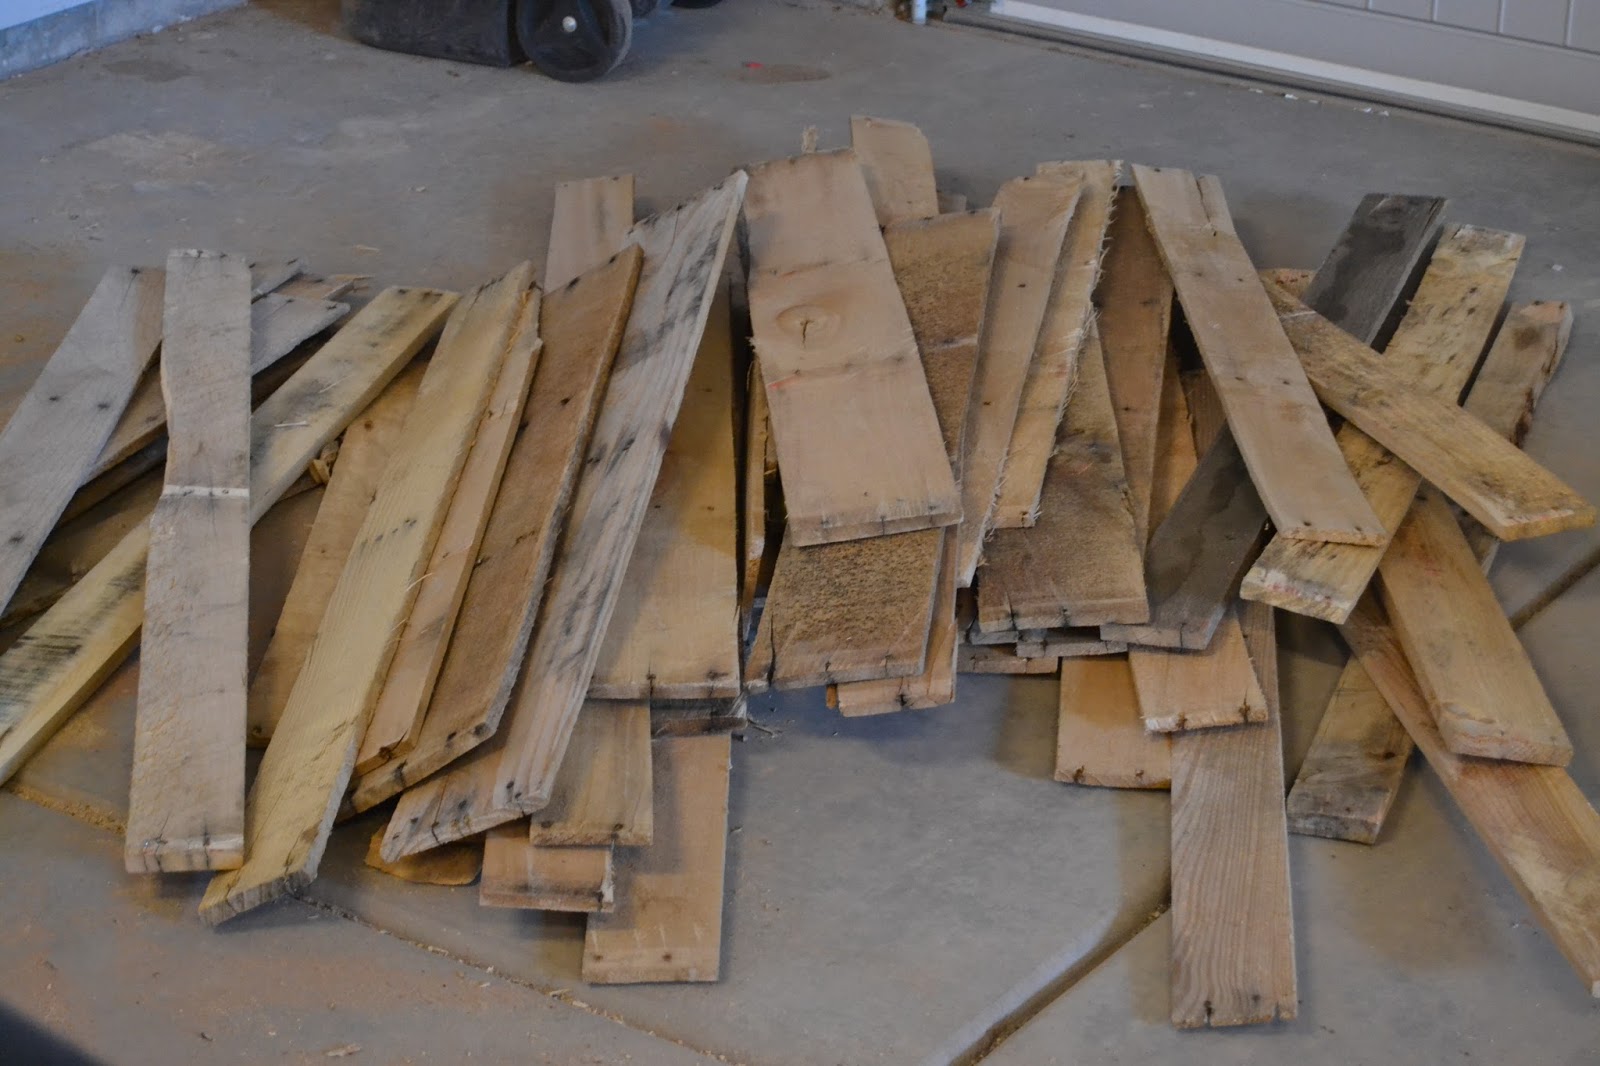
We started by breaking down pallets that we had been collecting from dumpsters around our neighborhood, super classy right?! Our neighborhood always has 5-6 homes under construction, because it’s a brand new development, and we’ve found that if you ask the contractors they’ll be happy to let you dig through their dumpsters for treasures like pallets!
Yesterday we put together a quick video to show you how to break down your pallets quickly, without a lot of back-breaking labor. Click here for a reminder.
DIY Planter Boxes
Here’s what you’ll need for this project.
6 big pallets (broken down)
Nail Gun with Nails
Miter Saw
Wood Stain, I used Ebony from Minwax
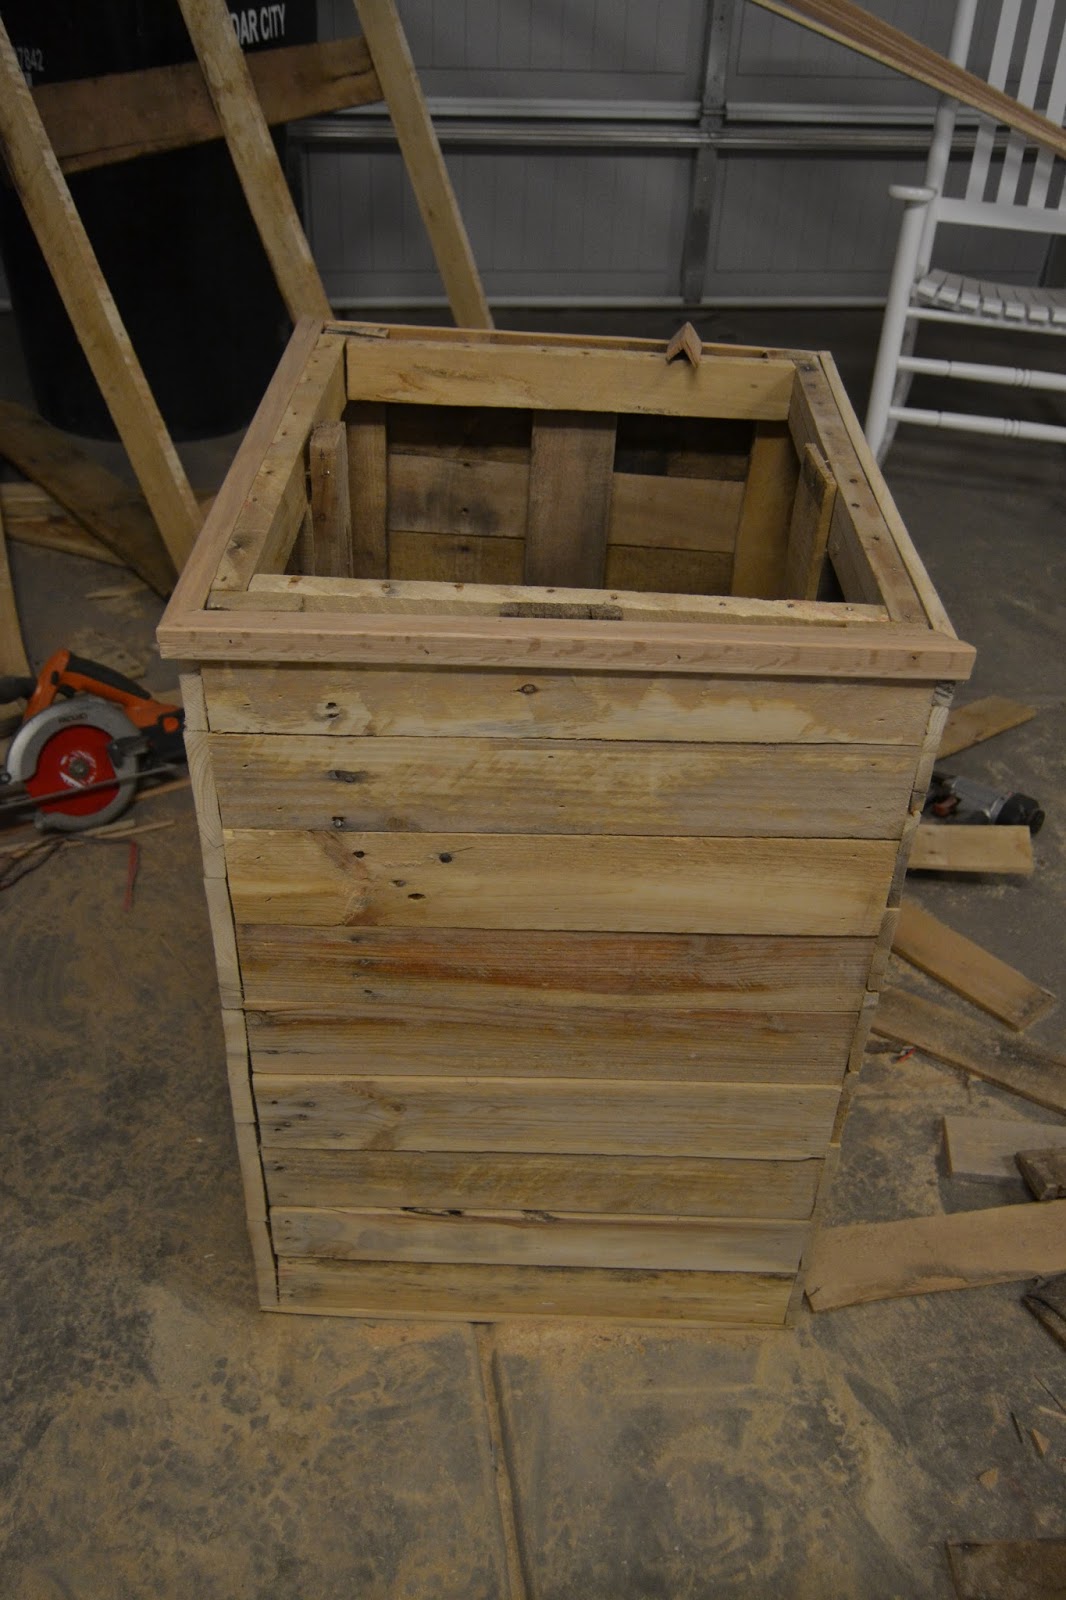
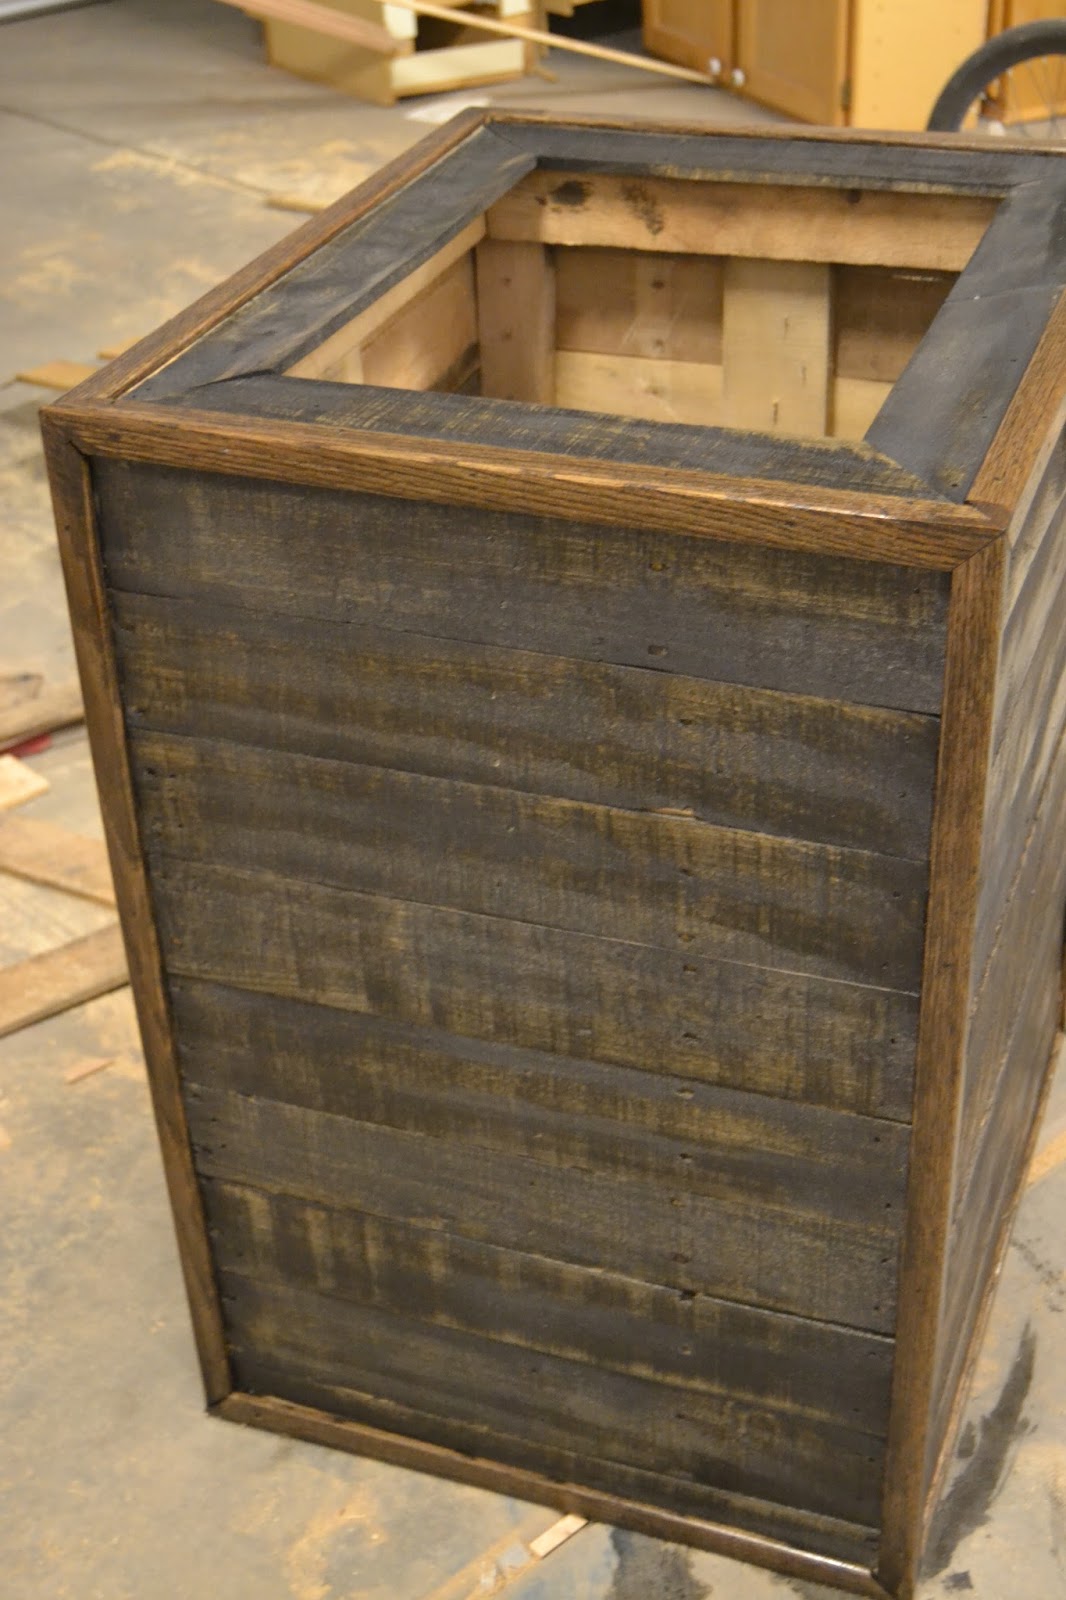
Start by deciding how big you want your boxes. Then build 2 identical boxes for the top and bottom frame.
Nail boards to the outside of the box to connect your top and bottom frames. We added an additional supportive beam in the center of the biggest sides.
Now cut your pallet pieces to the width of the planter box and nail them on from top to bottom. Just stack them on.
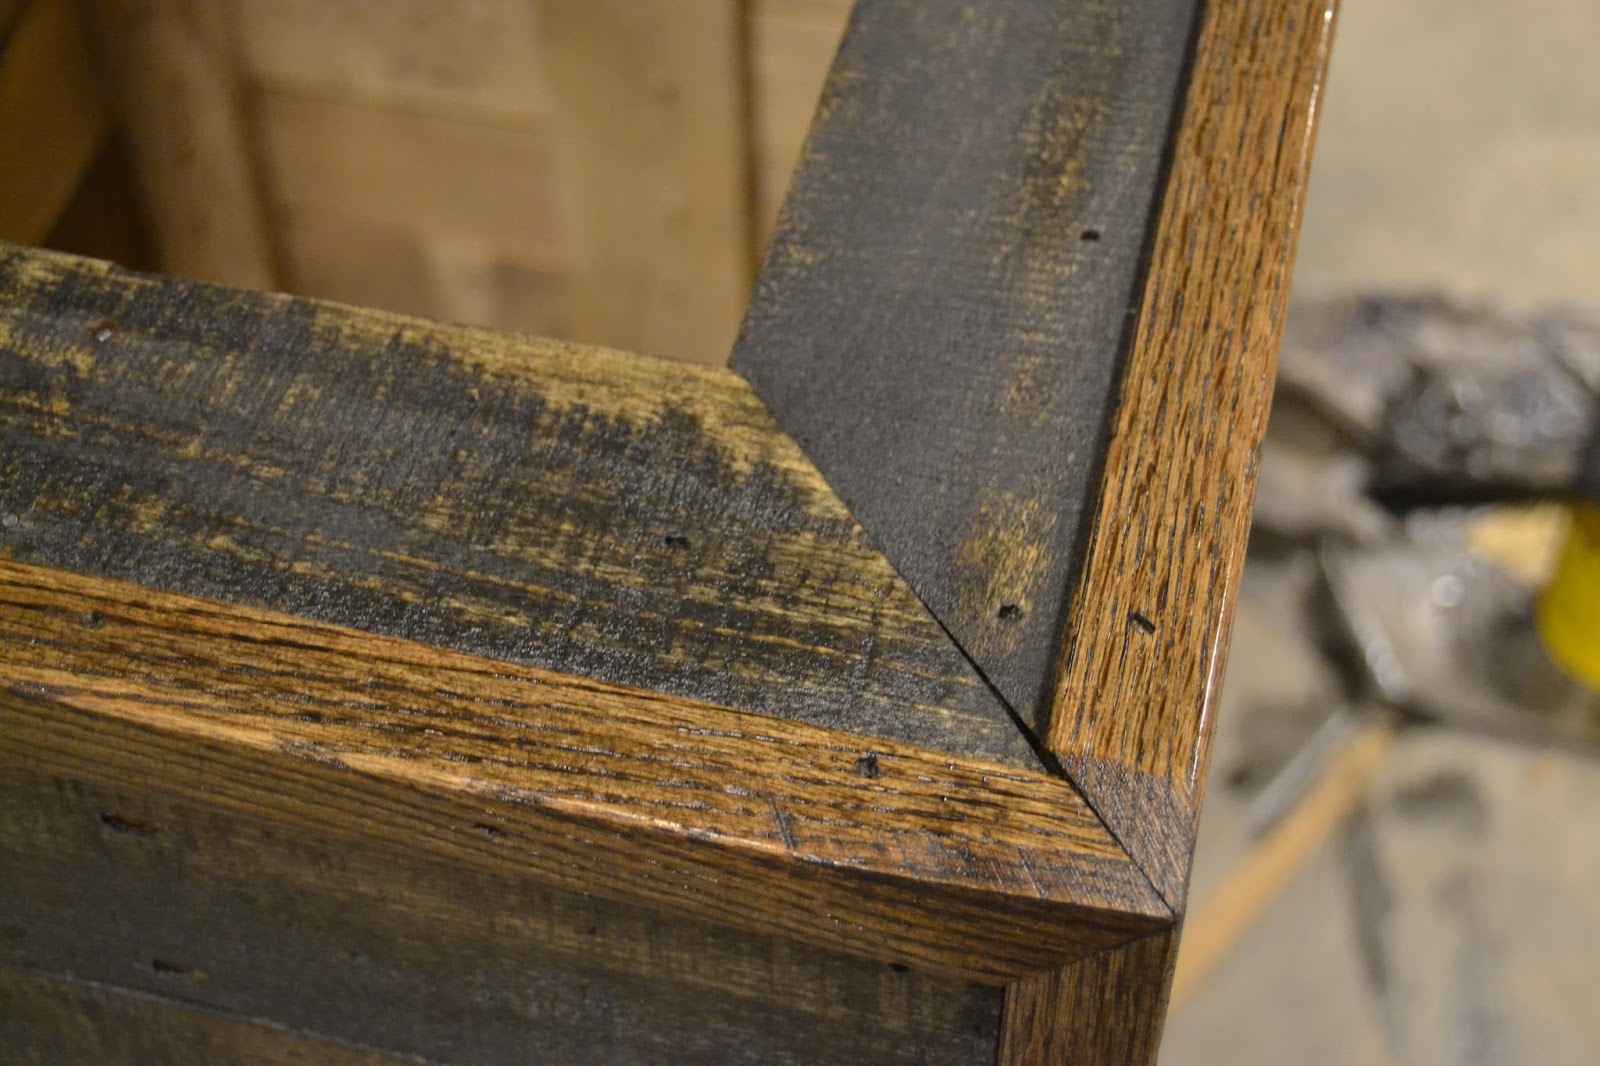
We used the miter saw to cut 4 boards at 45 degrees and then used them to frame the top.
Now flip the box. We weren’t sure how much dirt we’d need in the bottom of the planter at this point, so we didn’t put the bottom on yet. We ended up building a shelf on the inside, halfway up the box, once we realized we didn’t want to use that much potting soil. You can put a bottom on it at this point if you’d like before you add your trim. It’s up to you, and it really just depends on how big you want your boxes to be.
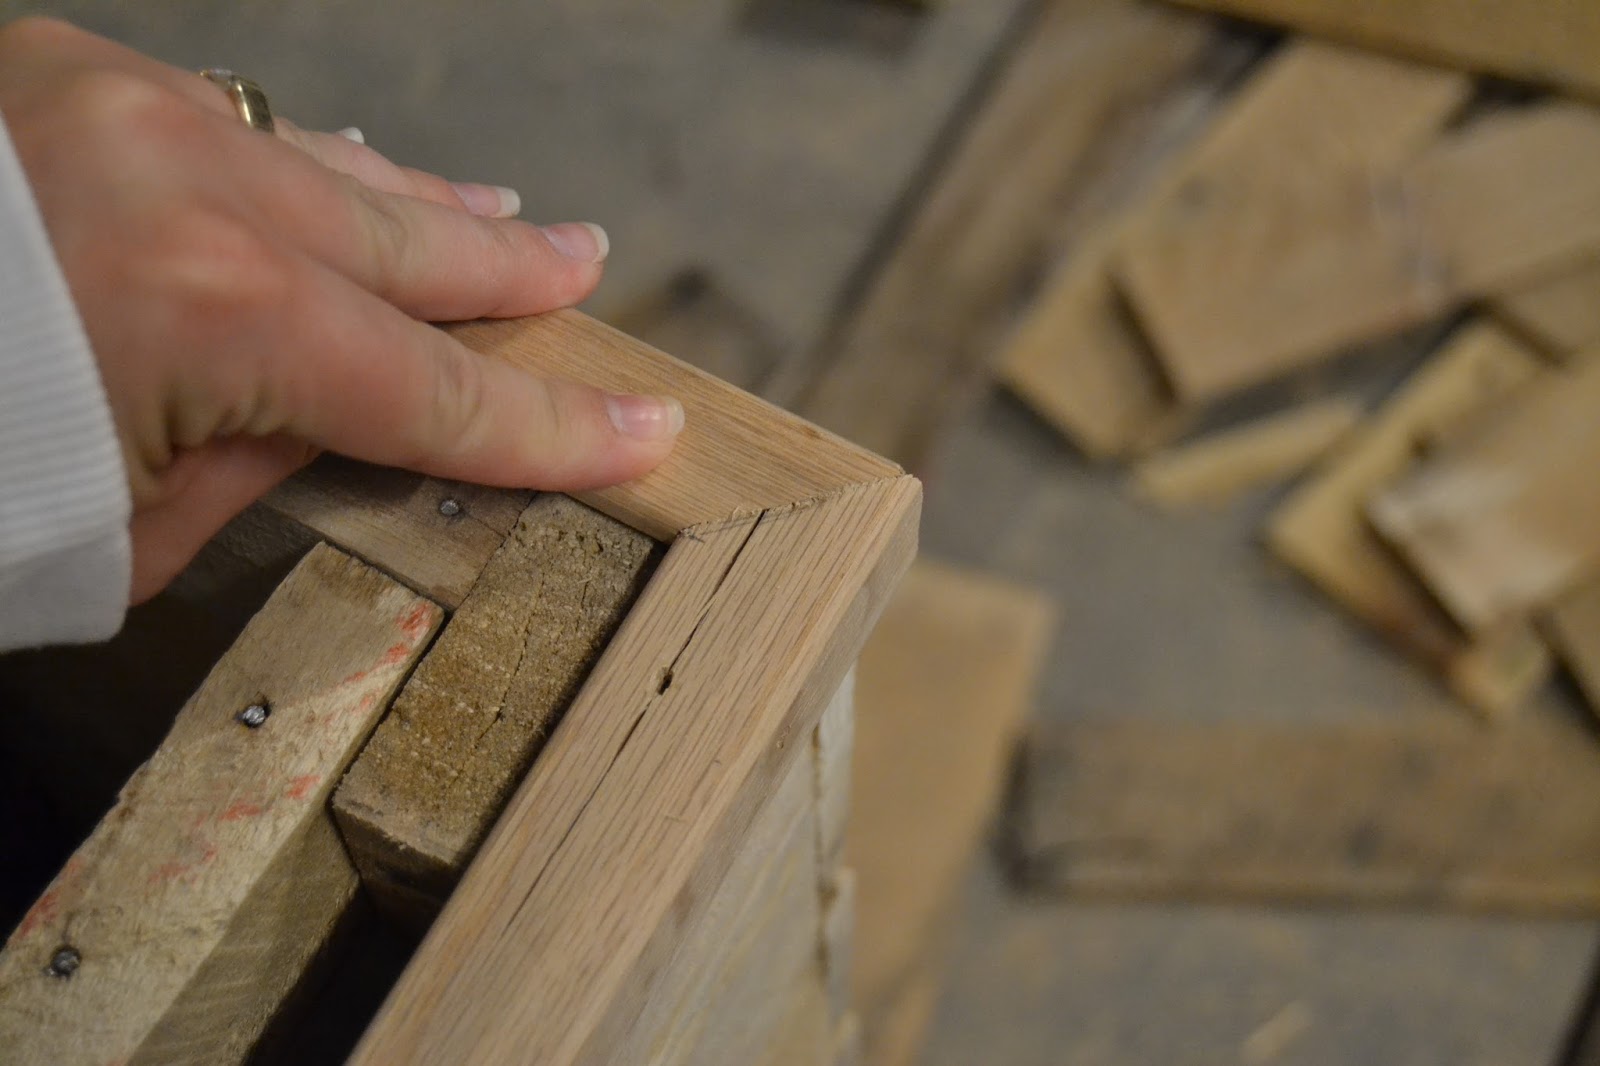
We added trim to the edges and the bottoms of the box, to help make it look more finished. It was the only part of the project that cost any money, and the trim isn’t cheap, so you’ll have to decide if it’s worth it. I think our total cost for all the trim was $50, but the planters were HUGE and if you bought anything that big, it would easily be over $100 each, trust me…I checked.
I wasn’t satisfied with the way they looked without it though, I wanted a more finished look.
Once you’ve trimmed your box out, now you need to sand that baby down until it’s smooth as a baby’s bottom. Make the job super easy with 150 grit sandpaper and a belt sander.
Now comes the fun part, in my opinion. I used the Ebony Minwax stain for this project. I used about 3 coats because I wanted them black, this picture was taken after one coat, but I don’t think I mixed the stain properly, because I used the same type of stain for another project and it was black after the first coat. So… lesson learned…mix your stain thoroughly!
Now you have some beautiful boxes to put on your porch! Now comes the hard part, deciding what to plant in them!


 Your Closest CHEERLEADERS!
 We are your big sisters , cheerleaders , and confidence boosters in building a happy home. We are the Lou Lou Girls!


Your planters turned out beautifully!! Great post!
Heather
Thanks Heather!
They look so good! Your porch is beautiful! Thanks for sharing it with us!
Thanks Pam!
These look amazing! Would be so nice for a front door entry!
Thanks Cara!
looks great! i tried putting greens on my porch and not actually planting them in the pots, and the whole stinking thing blew over. and they were tiny plants, not like yours! ugh.
b
Ugh! Such a letdown! It blows so hard here in the Spring, I can totally relate. IF you wanted to try again, you could try putting rocks or cinder blocks in the bottom of the planter, to help weigh it down a little!
Saved and pinned. I am definitely doing this!
Thanks Tracey! Send pictures when you do it!
The planter boxes look great Jessica – Thanks for sharing with Pin Worthy Wednesday
What a great job and they look so elegant. Thanks for sharing your idea with us at Over the Moon.
How cool, I'm in the market for new planters to replace the shabby looking ones that I've had for several years. This might just be the answer (now if only I could find the time to devote to executing this awesome DIY project). Thanks for sharing on Project Inspire Link Party!
These look awesome! I've been looking for some planter ideas and these would be perfect. Such a great idea!
~Erin
Thanks Elizabeth!
Thank you for this. I can get pallets so easily. I've wanted some planters.
Beautiful planters, nice job!
Thanks Jen!
It looks so easy from the pics. I would love to try this project as I find buying planters this size is so expensive. Great job!
http://the-wardrobe-stylist.com/2016/04/11/buy-drape-bollywood-sarees/
Thanks! Yep, it's a lot cheaper to DIY!
These turned out so cute!
Thanks Ashley!
What a great use of pallets!! And it turned out beautifully!! I like the trim too! Thanks for sharing on My 2 Favorite Things on Thursday! Hope to see you tomorrow!! Pinned!
I love the idea of using pallets for planters! You would pay big bucks for those at a nursery. They look amazing!
Thanks Vineta!
Your planter boxes look wonderful! Such big ones would be so expensive to purchase. Thanks for sharing a way to make them inexpensively.
Thanks so much for joining the Grace at Home party. I'm featuring you this week!
YAY! Thanks for the feature Richella!
Found you at Grace at Home. Those are gorgeous!!
Question — what did you use inside to hold the soil and such?
Glad to find you!
I just put in a shelf with scrap wood! Sorry I didn't add any pictures, my husband finished it completely before I could get any. If you need a lot of soil for roots, you can just finish the bottom of the planter with more planks. We built a shelf inside of the planter, about halfway up so that we didn't need to use quite as much soil.
I just put in a shelf with scrap wood! Sorry I didn't add any pictures, my husband finished it completely before I could get any. If you need a lot of soil for roots, you can just finish the bottom of the planter with more planks. We built a shelf inside of the planter, about halfway up so that we didn't need to use quite as much soil.
Hi Girls – I Love this project! What a fresh way to use pallet wood! Your post will be featured this week on Friday Favorites, at mustlovehome.com. It will also be pinned, tweeted and posted on Facebook. I would love for you come check it out – Christine
Thanks Christine!
These look great and I bet they cost a fraction of a ready made box. Thanks for sharing this on Merry Monday. Pinned.
Thanks Erlene! Yes, they're a lot cheaper than buying from the store!
Love this look! They complete the front of your beautiful home.
Aw! Thanks Emily!
Love those pallet planters. The video was great!
Thanks for sharing at Turn It Up Tuesday,
Bev
I LOVE those planters!! I've seen some over the Internet but yours look so classy! Love that you trimmed them too.
I will be featuring this next Tuesday at our Two Uses Tuesday party, so don't forget to stop by and grab your button.
I would love to invite you to share it with us at our new Sweet Inspiration party, which is live every Friday: http://sweethings.net/sweet-inspiration-link-party-2/, so more people can be inspired.
Hugs,
I love these! They look amazing on your porch. I'll be featuring your project at The Scoop this Monday night. Thank you for linking up!
Beautiful, that is great, thanks for sharing with Hearth and soul blog hop. pinning and tweeting.
Such a fabulous upcycle, the visual impact to your front door is impressive. I just had to include this in my Earth Day roundup. http://www.purfylle.com/2016/04/36-earth-day-ideas.html
Thanks!
Nice DIY massive planter boxes. I have other project idea. I will build a nice indoor koi pond and a black soldier fly culture bin
that sounds amazing!